django rest framework , django , digital ocean
Before following this blog please have a look at our previous blog where we explain how to deploy a Django application to the Digital Ocean server.
Domain Registration
1. We get an IP address when we create a new droplet. we can't remember the IP address all the time, That's why we need a domain name.
2. Buy any domain name you want from domain registrars. These are the top domain registrars to buy your domain name from. GoDaddy, NameCheap, Domain.com
3. We need to point the IP address of our droplet to a domain name that we bought.
4. Go to Digitalocean dashboard, Click on create > Domain/DNS.
5. Add your domain name under the Add a domain tab and select the appropriate project and your domain are added to the project/droplet. 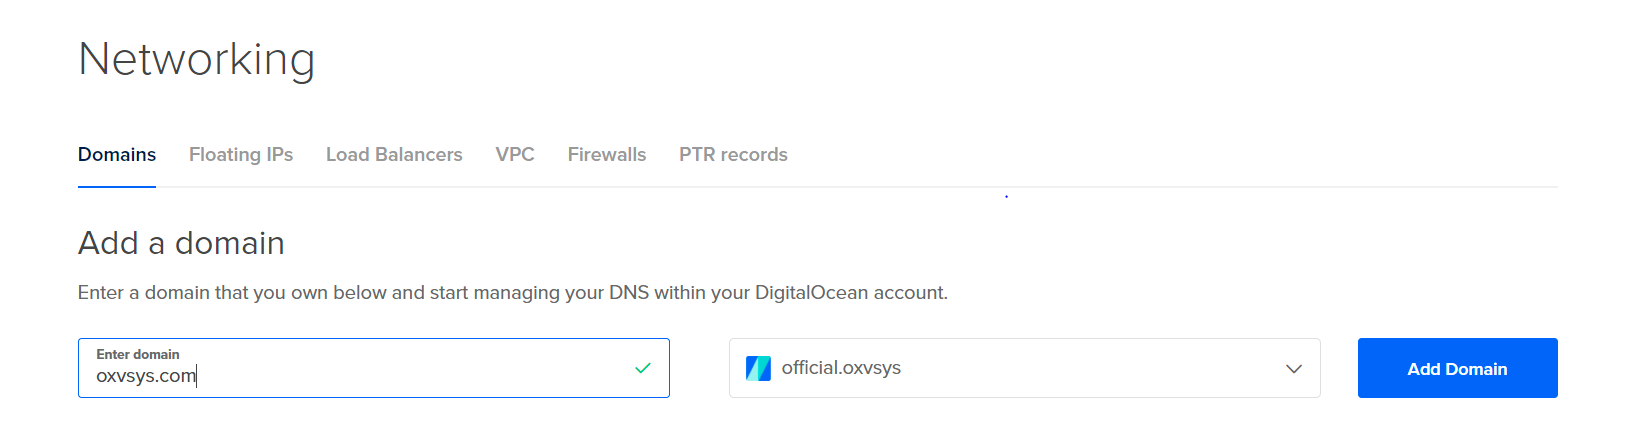
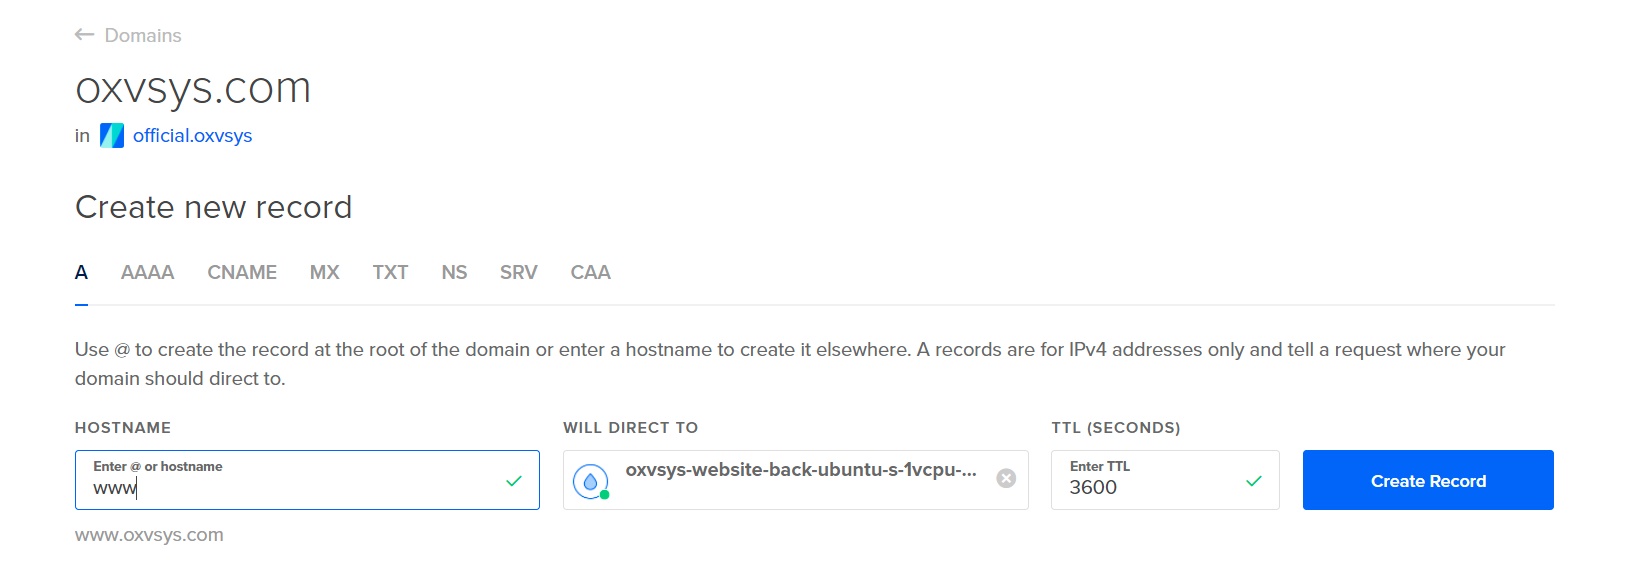
6. After that we need to add the following records in the input fields and create a record:
  HOSTNAME = `@`
  WILL DIRECT TO = `Your droplet`
  TTL (SECONDS) = `3600`

7. add another record
  HOSTNAME = `www`
  WILL DIRECT TO = `Your droplet`
  TTL (SECONDS) =`3600`
8. We still need to point the name servers for this domain,
9. Go to Godaddy dashboard > Manage your Domain DNS and add the following record: > Type = NameServer > Host = @ > Points to ns1.digitalocean.com > TTL = 1/2 hour 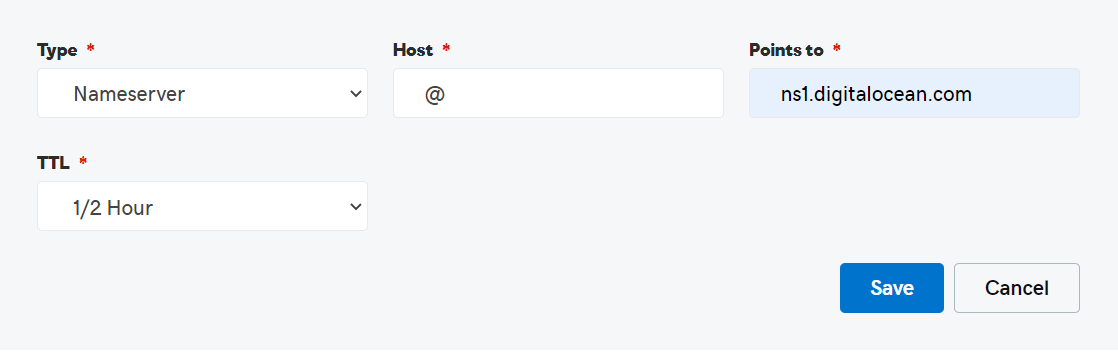
10. repeat this step for ns2.digitalocean.com and ns3.digitalocean.com. After adding all records, you will see like this 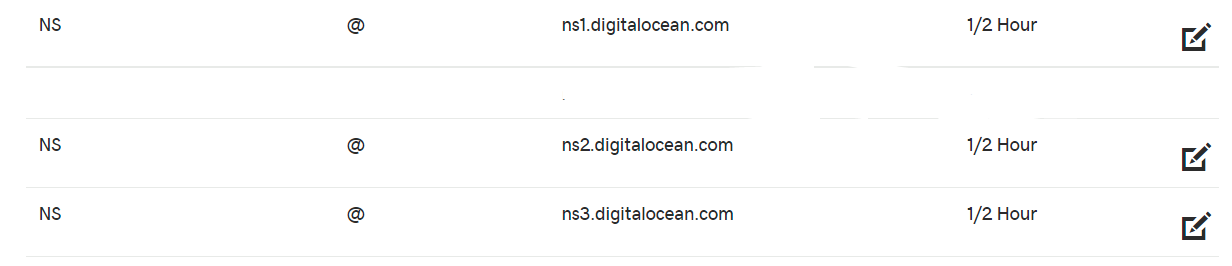
11. Add your domain names in ALLOWED_HOSTS.
12. Restart Gunicorn service service gunicorn restart.
13. Go to /etc/nginx/site-available/djangoproject file and set server_name property www.oxvsys.com oxvsys.com
14. Restart the server by typing sudo systemctl restart nginx
Congratulations
We have successfully registered the domain name for our app. Stay tuned for the next part where will set up the HTTPS Digital Ocean Ubuntu Server.