getting started , django rest framework , django
It is a four-part series. In this first part, we will talk about Django Rest Framework. how to install it? how does it work? how we can use it to build Web APIs. But before we go deep dive into the Django rest framework, first we will understand Django and an API. In the next part, we will create a Web API.
What is Django
In one line we can say "Django is a web framework for perfectionists with deadlines".
Django is a high-level Python web framework that encourages rapid development and clean, pragmatic design. Built by experienced developers, it takes care of much of the hassle of web development, so you can focus on writing your app without needing to reinvent the wheel. It’s free and open source.
What is an API?
API is the acronym for Application Programming Interface. An API is a connection between computers or between computer programs. It is a type of software interface, that offers a service to other pieces of software. To explain this better, let us take a familiar example that we can relate to.
Imagine you’re sitting at a table in a restaurant with a menu of choices to order from. The kitchen is the part of the “system” that will prepare your order. What is missing is the critical link to communicate your order to the kitchen and deliver your food back to your table. That’s where the Waiter or API comes in. The waiter is the messenger – or API – that takes your request or order and tells the kitchen – the system – what to do. Then the waiter delivers the response back to you; in this case, it is the food.
Now you've understood what is an API and how it works. We only scratch the surface, there is more of it.
Django Rest Framework
Django REST Framework is a powerful and flexible toolkit for building Web APIs.
✅Out of the box, Django provides a built-in admin section.
✅It also provides Web Browsable API which is useful for developers.
✅Authentication policies include packages for OAuth1a and OAuth2.
✅Supports both ORM and non-ORM data sources.
✅It is highly customizable.
✅It has Extensive documentation and great community support.
✅Used and trusted by internationally recognized companies including Mozilla, Red Hat, Heroku
Before we can use Django Rest Framework first we need to install Python and Django.
Install Python
It is a Python Web Framework, it requires Python.
Get the latest version of Python at https://www.python.org/downloads/
To check if Python is correctly installed you can run this command from your terminal python --version
Virtual environment
When working on a Python project, we have to work with several libraries such as Django and Django REST Framework.
How do allow each project to have its own version of Python and its own versions of libraries?
We will be using virtual environments.
Python provides you with a system that allows you to create virtual environments.
Once the environment has been created and activated, all the libraries installed can be used only in the environment to which they belong.
How to create a virtual environment
Normally we place a virtual environment in the project folder.
1. Create and access a directory for our project
	mkdir djangoproject
	cd djangoproject
2. Now run the following command to create a virtual environment.
3. python -m venv venv where venv is the name we give to our environment
4. Once created you can activate it using venv\Scripts\activate
5. For Mac OS /Linux, use the following command to activate the virtual environment source venv/bin/activate
6. That's all! Now we have created a virtual environment created for our project
7. To deactivate the virtual environment you must run deactivate
Install Django and Django Rest Framework
1. Before installing, any library makes sure your virtual environment is activated.
2. From the djangoproject folder and with the virtual environment enabled to run the following commands:
    pip install django
    pip install djangorestframework
3. From this point on, make sure you are in the project directory djangoproject and that the virtual environment is activated while executing commands.
Create a project
1. From the command line, cd into a project directory where we are going to store our code, then run the following command in the command
prompt / terminal: django-admin startproject app .
2. This command will create a app directory in your djangoproject directory.
3. It will take care of the initial setup. Namely, it will auto-generate some code that establishes a Django project – a collection of settings for an instance of Django, including database configuration, Django-specific options, and application-specific settings.
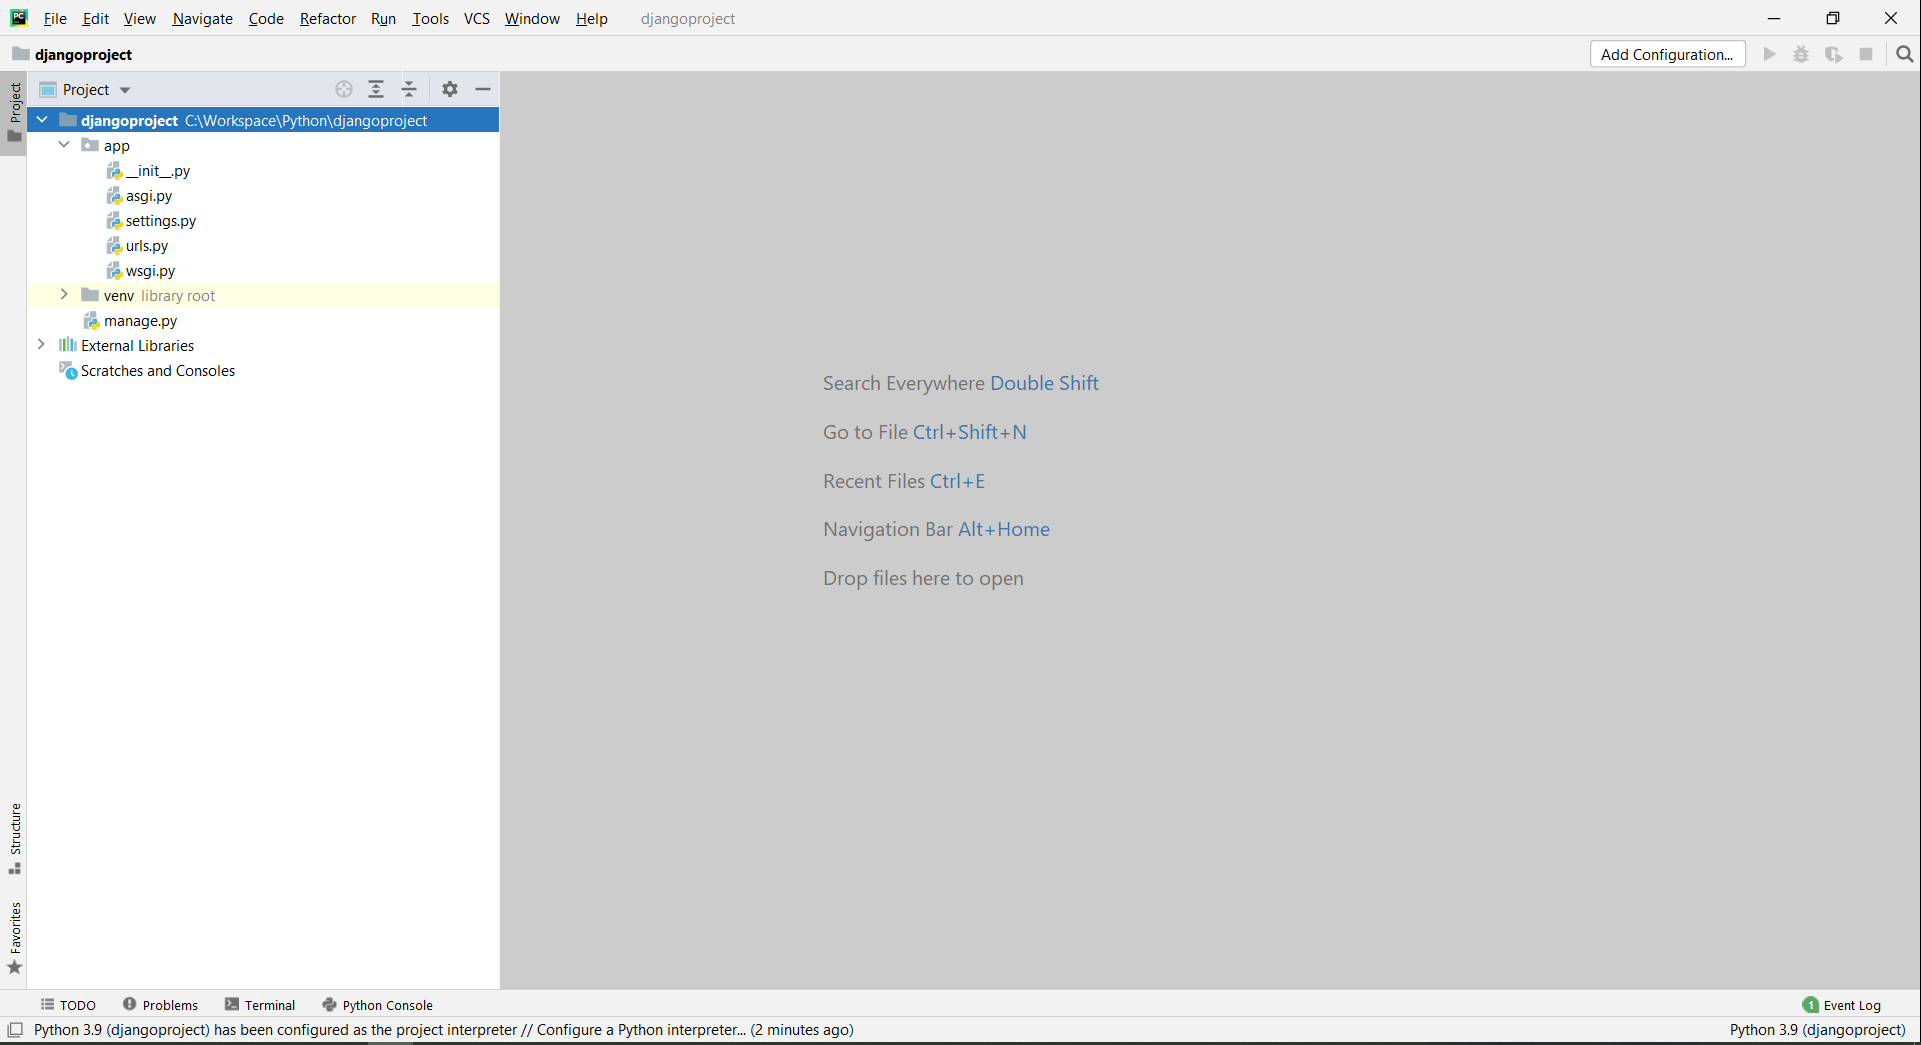
4. Let's look at what startproject command created:

All of the project structure and files might look like a lot, but don't worry, they are there to simplify application development.
These files are:
1. The outer djangoproject the root directory is a container for your project. Its name doesn’t matter to Django; you can rename it to anything you like.
2. manage.py: A command-line utility that lets you interact with this Django projects in various ways
3. The inner app the directory is the actual Python package for your project. Its name is the Python package name you’ll need to use to import anything inside it (e.g. app.urls).
4. app/__init__.py: An empty file that tells Python that this directory should be considered a Python package.
5. app/settings.py: Settings/configuration for this Django project
6. app/urls.py: The URL declarations for this Django project; a “table of contents” of your Django-powered site.
7. app/asgi.py: An entry-point for ASGI-compatible web servers to serve your project.
8. app/wsgi.py: An entry-point for WSGI-compatible web servers to serve your project.
Now add rest_framework to your INSTALLED_APPS in settings.py
INSTALLED_APPS = [
...
'rest_framework',
]
The Development Server
1. Let's verify our Django project works.
2. Make sure you are in the project directory djangoproject and that the virtual environment is activated and runs the following command:
3. python manage.py runserver
4. You’ll see the following output on the command line:
5. Watching for file changes with StatReloader
Performing system checks...
System check identified no issues (0 silenced).

You have 18 unapplied migration(s). Your project may not work properly until you apply the migrations for app(s): admin, auth, contenttypes, sessions.
Run 'python manage.py migrate' to apply them.

 September 24,2021 - 13:12:58
Django version 3.2.7, using settings 'app.settings'
 Starting development server at http://127.0.0.1:8000/ Quit the server with CTRL-BREAK.
Note: Ignore the warning about unapplied database migrations for now; we’ll deal with the database shortly.
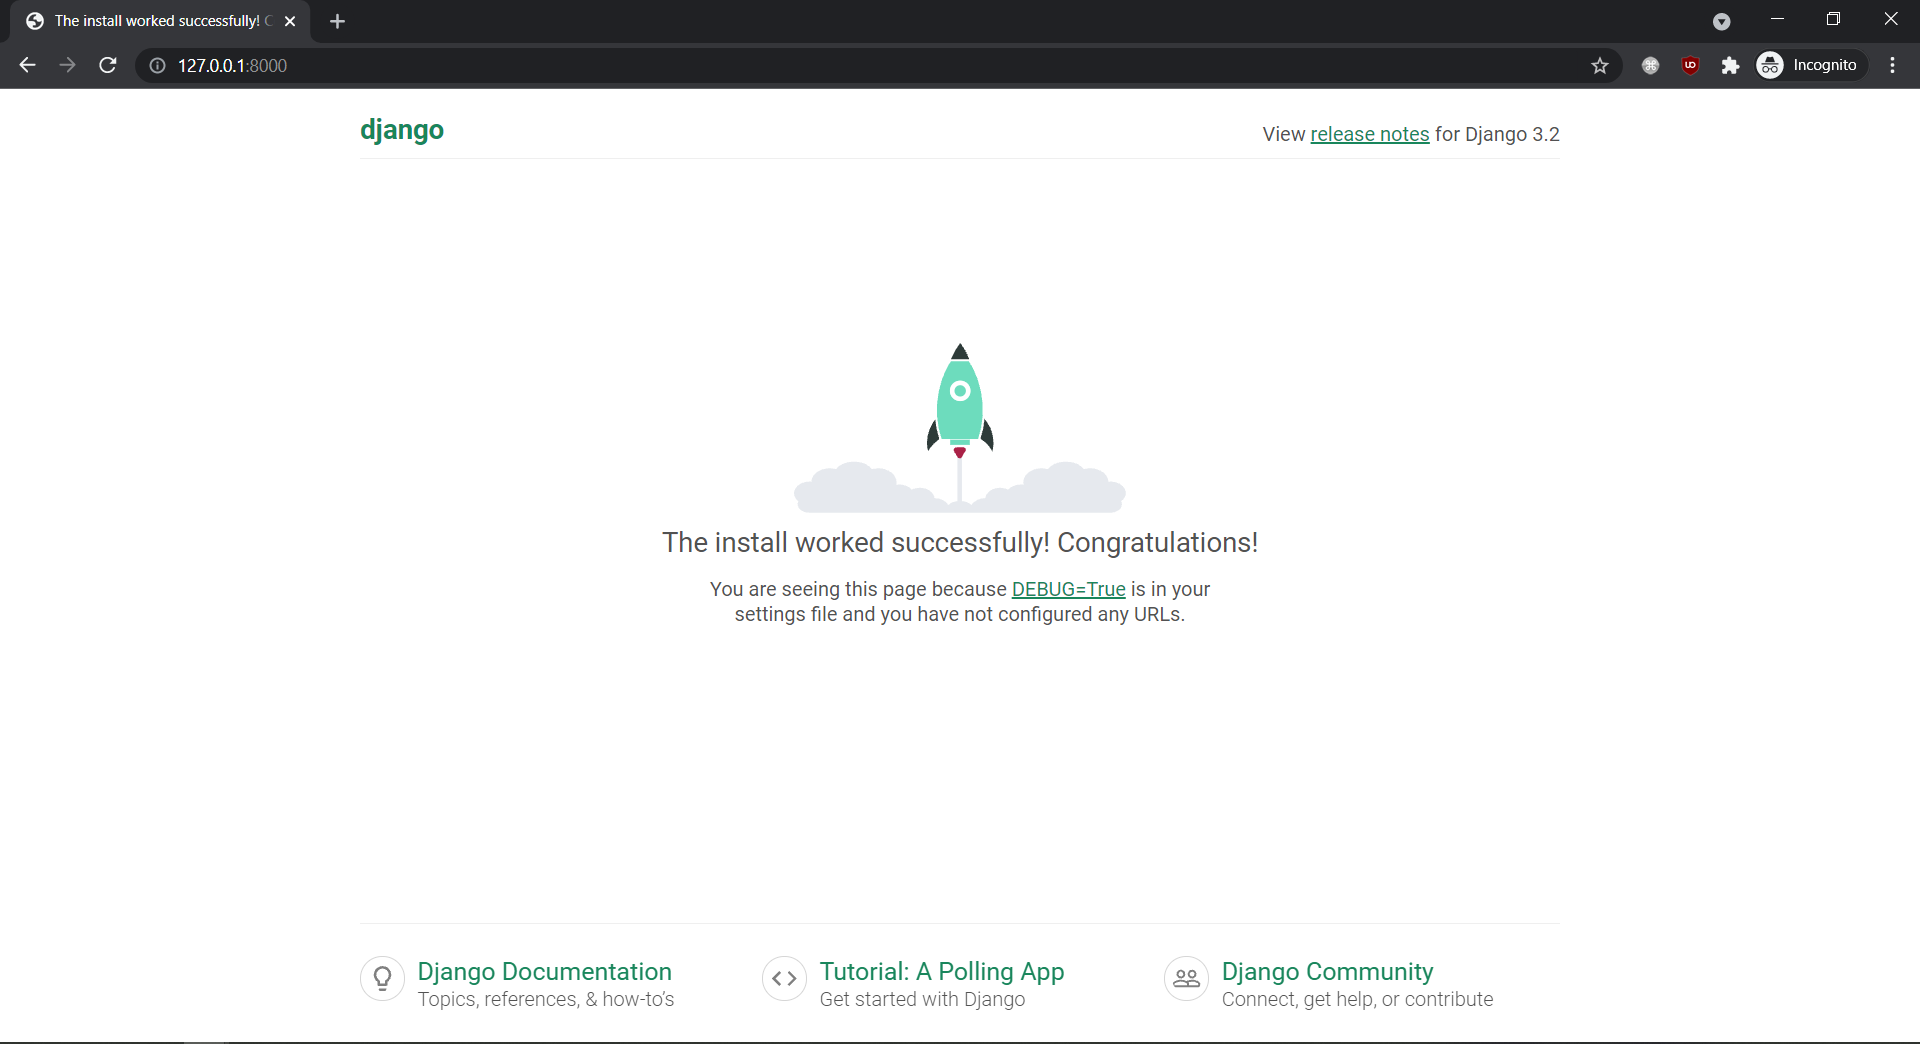
Now that the server's running, visit http://127.0.0.1:8000/ with your web browser. You'll see a "Congratulations!" page, with a rocket taking off.

Changing the port, By default, the runserver command starts the development server on the internal IP at port 8000.
If you want to change the server’s port, pass it as a command-line argument. For instance, this command starts the server on port 8080
python manage.py runserver 8080
End of the first part
That's all for today. In the next part, we will discuss Django migrations, databases, and Django admin. Stay tuned for the next part.