django rest framework , django , aws , s3
In this second blog of 3 part series, We will configure Amazon S3 (Simple Storage Service) to store and serve static and media files.
Table of contents
- What is Amazon S3? (Part 1)
- Building a small Django application for uploading images (Part 1)
- Create an S3 Bucket
- AWS IAM (Identity and Access Management)
- Configure our Django app with AWS settings (Part 3)
- Summary (Part 3)
Create an S3 Bucket
1. To use AWS, you will need an AWS account. Sign up if you do not already have an account.
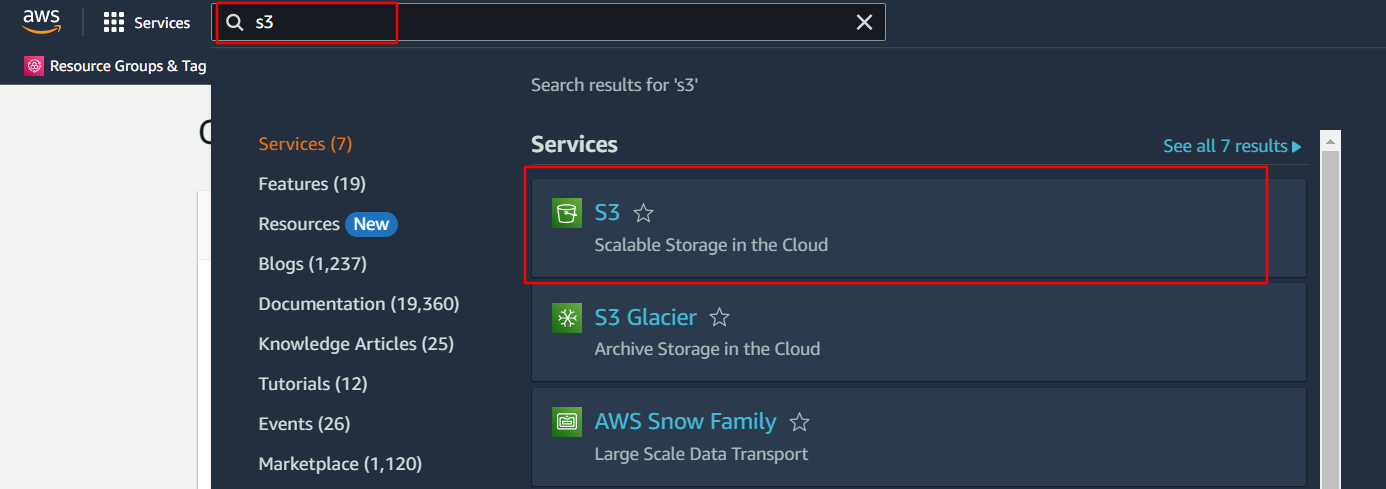
2. Search for S3 in the search box.
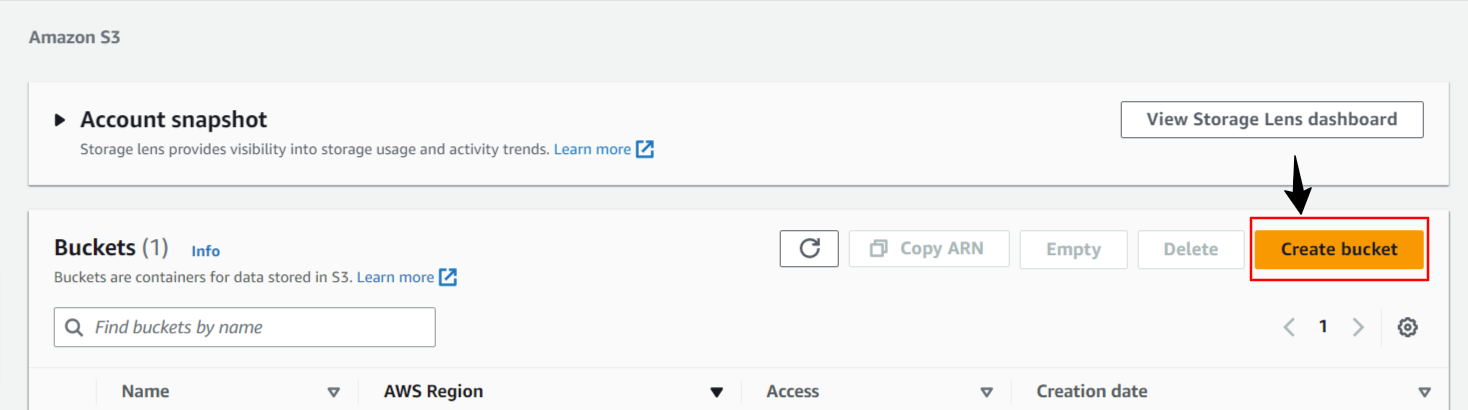
3. Click on Create Bucket button.
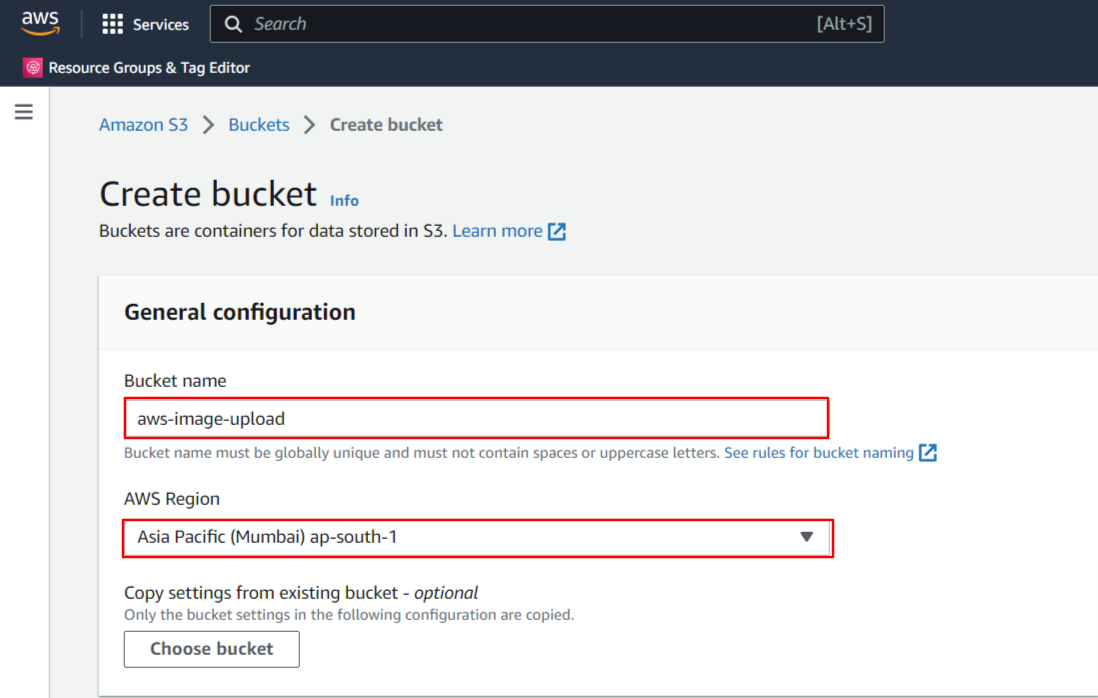
4. Provide a globally unique name to the bucket and select the appropriate AWS region.
(Note:- Bucket name must be globally unique and must not contain spaces or uppercase letters)
5. For this blog we are just going to set up a basic baseline configuration and you can explore the different options on your own. Keep the default option for the rest of the options which is recommended by AWS, and click on create bucket button.
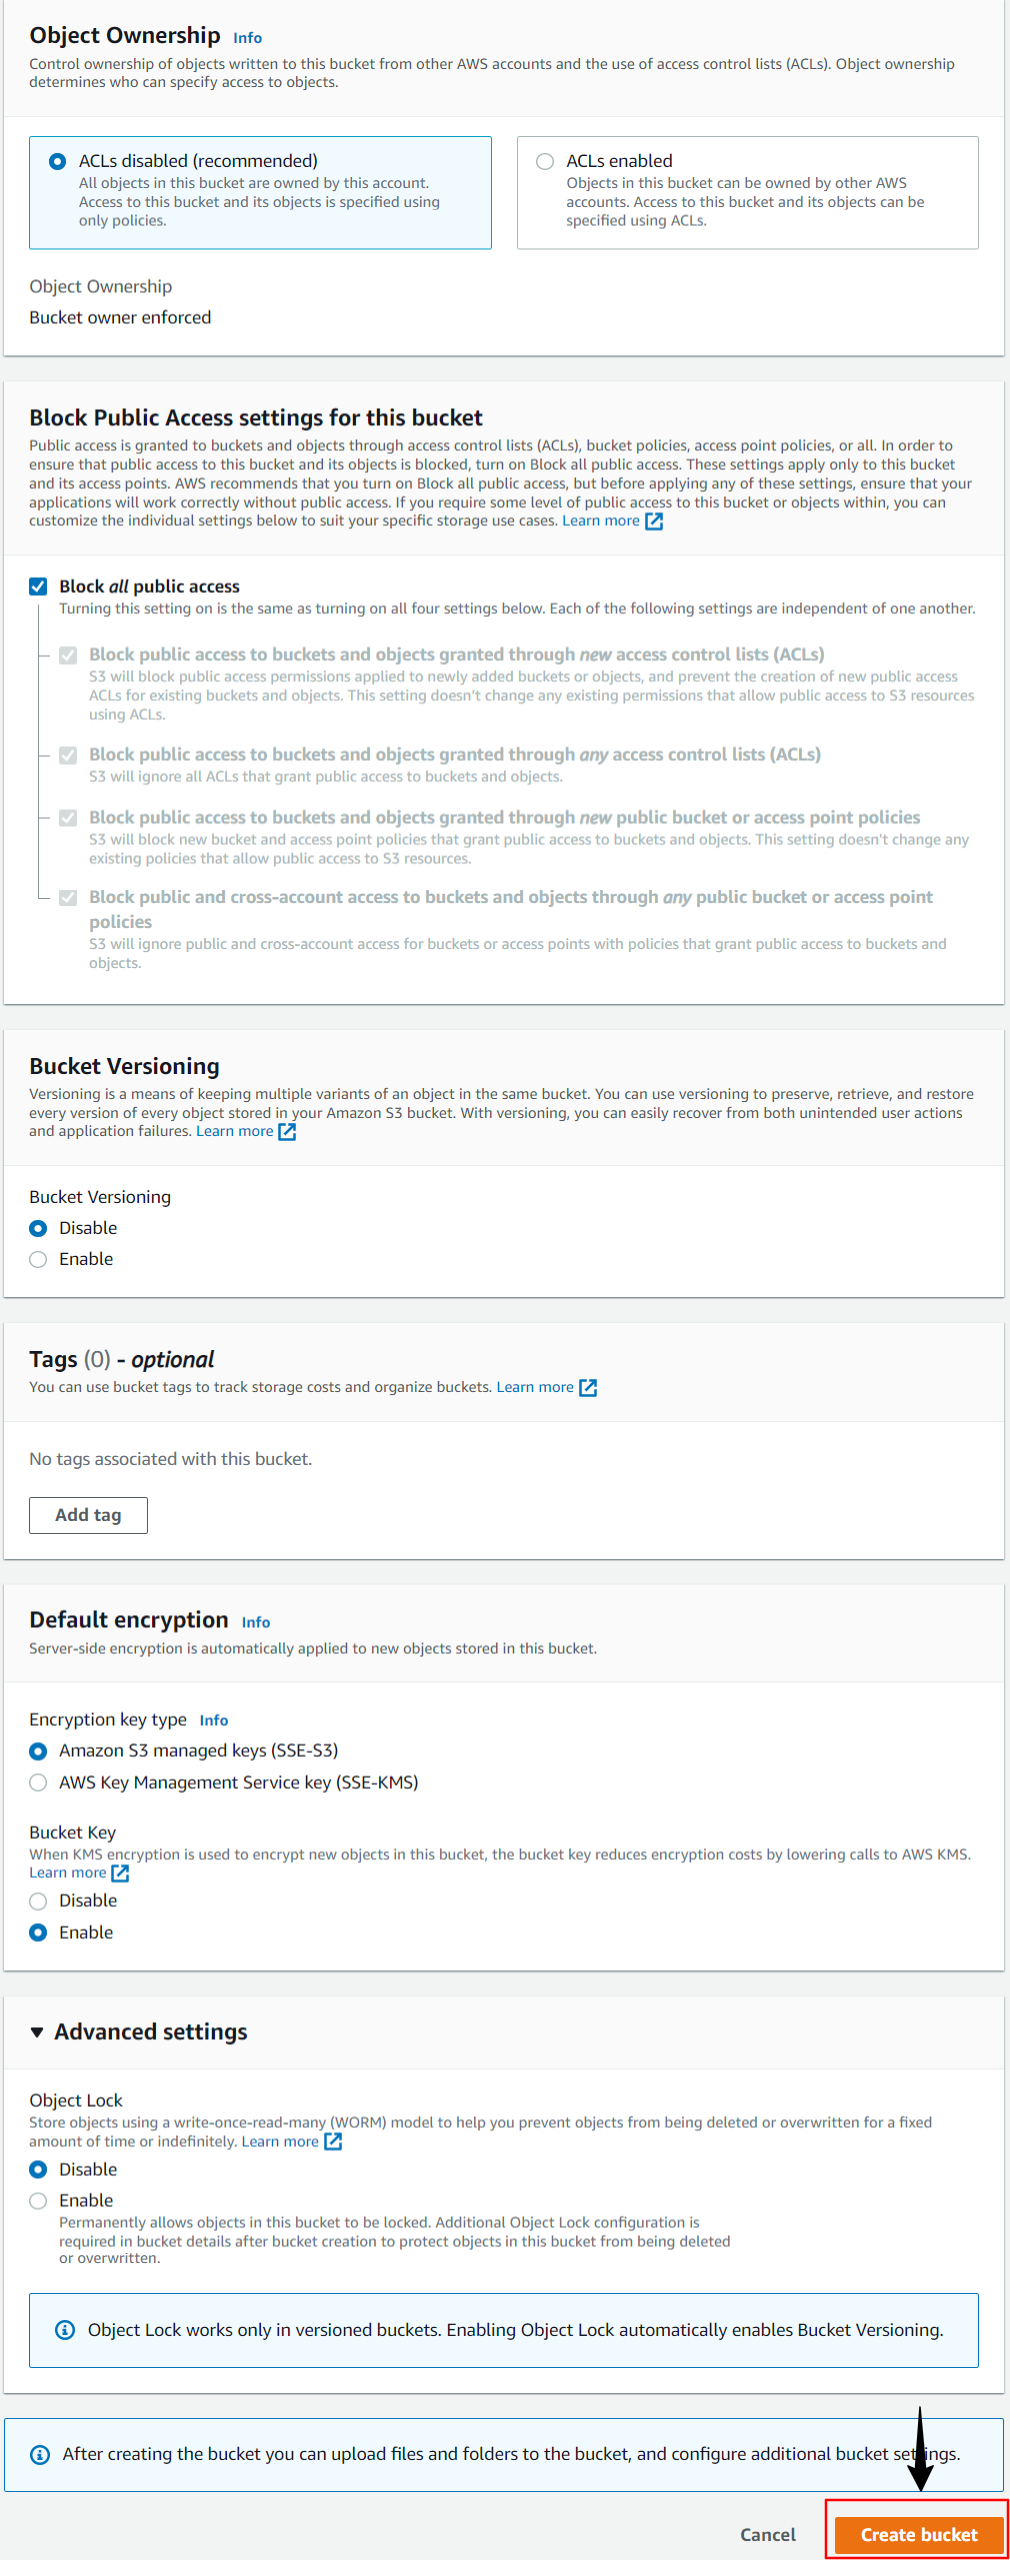
6. After clicking on create button you will be redirected to a console that shows the newly created bucket along with existing buckets.
AWS IAM (Identity and Access Management)
1. AWS Identity and Access Management (IAM) is a web service that helps you securely control access to AWS resources. With IAM, you can centrally manage permissions that control which AWS resources users can access. You use IAM to control who is authenticated (signed in) and authorized (has permissions) to use resources.
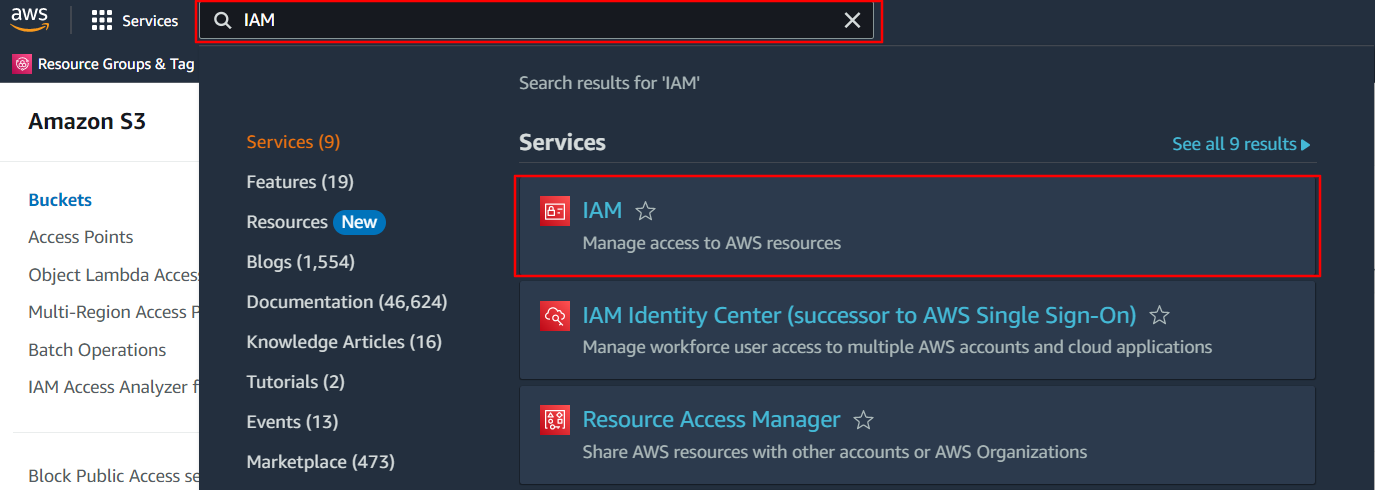
2. If you remembered the previous step we created a bucket with blocked public access. In order to access our bucket we will require AWS IAM.
3. Search for IAM in the search box.
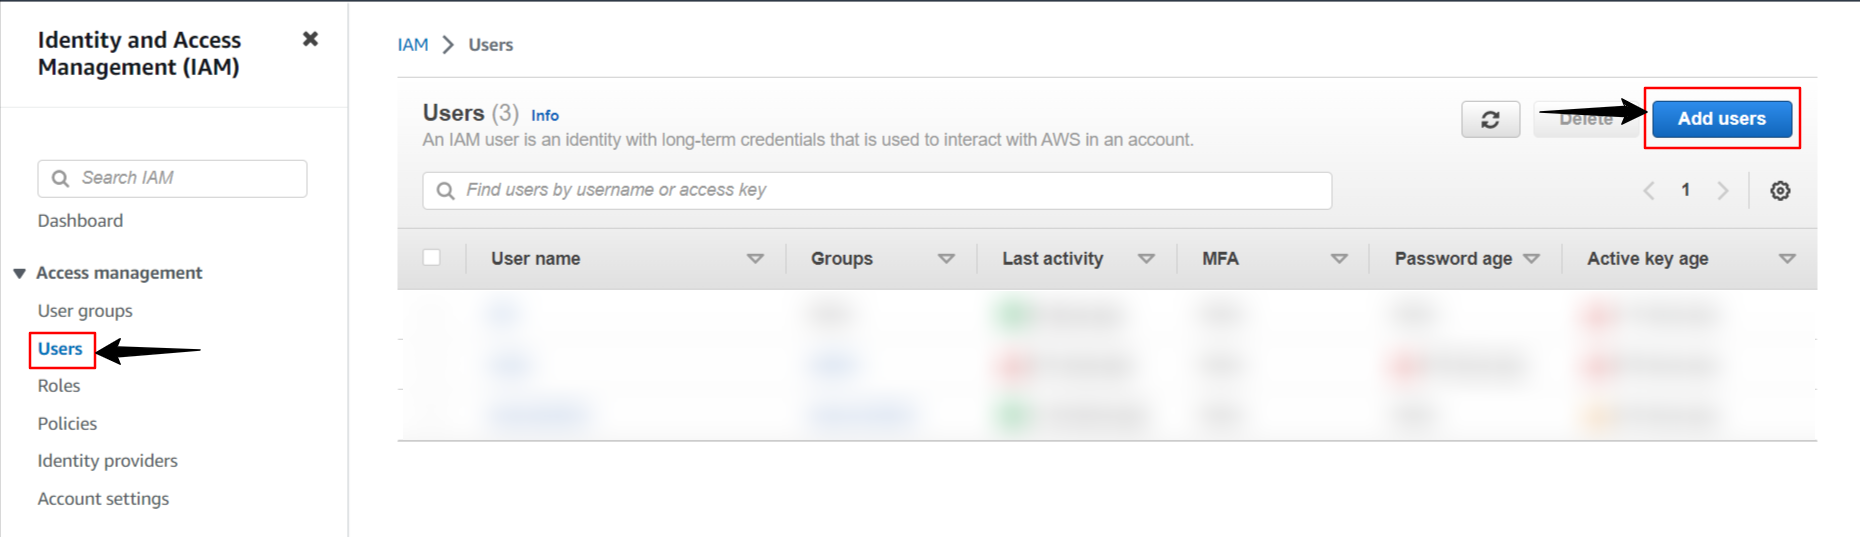
4. In the IAM service we are going to make a new user first. Click on Users and then click on Add Users button.
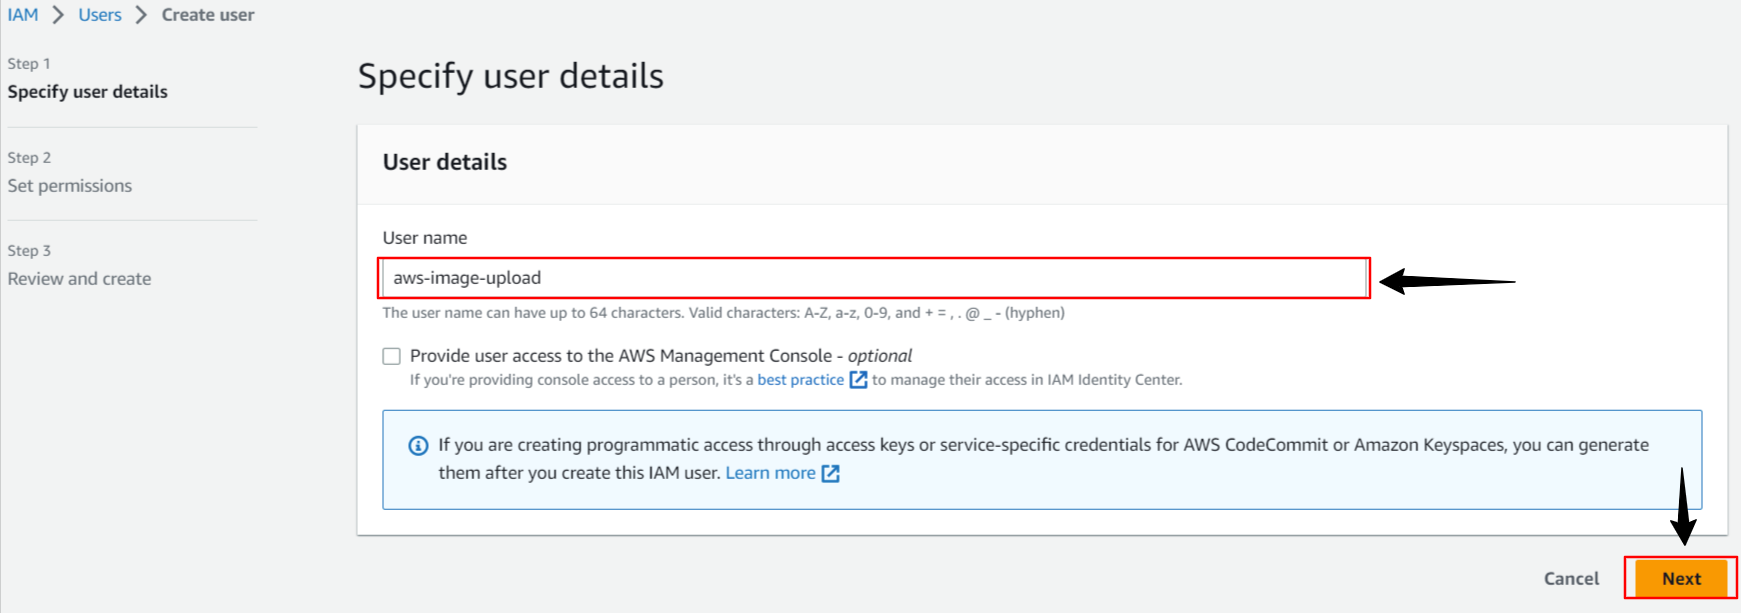
Specify the user name and click on the Next button.
We can create a user group from here or we can create a user first and later add it to user groups. Click on the Next button.
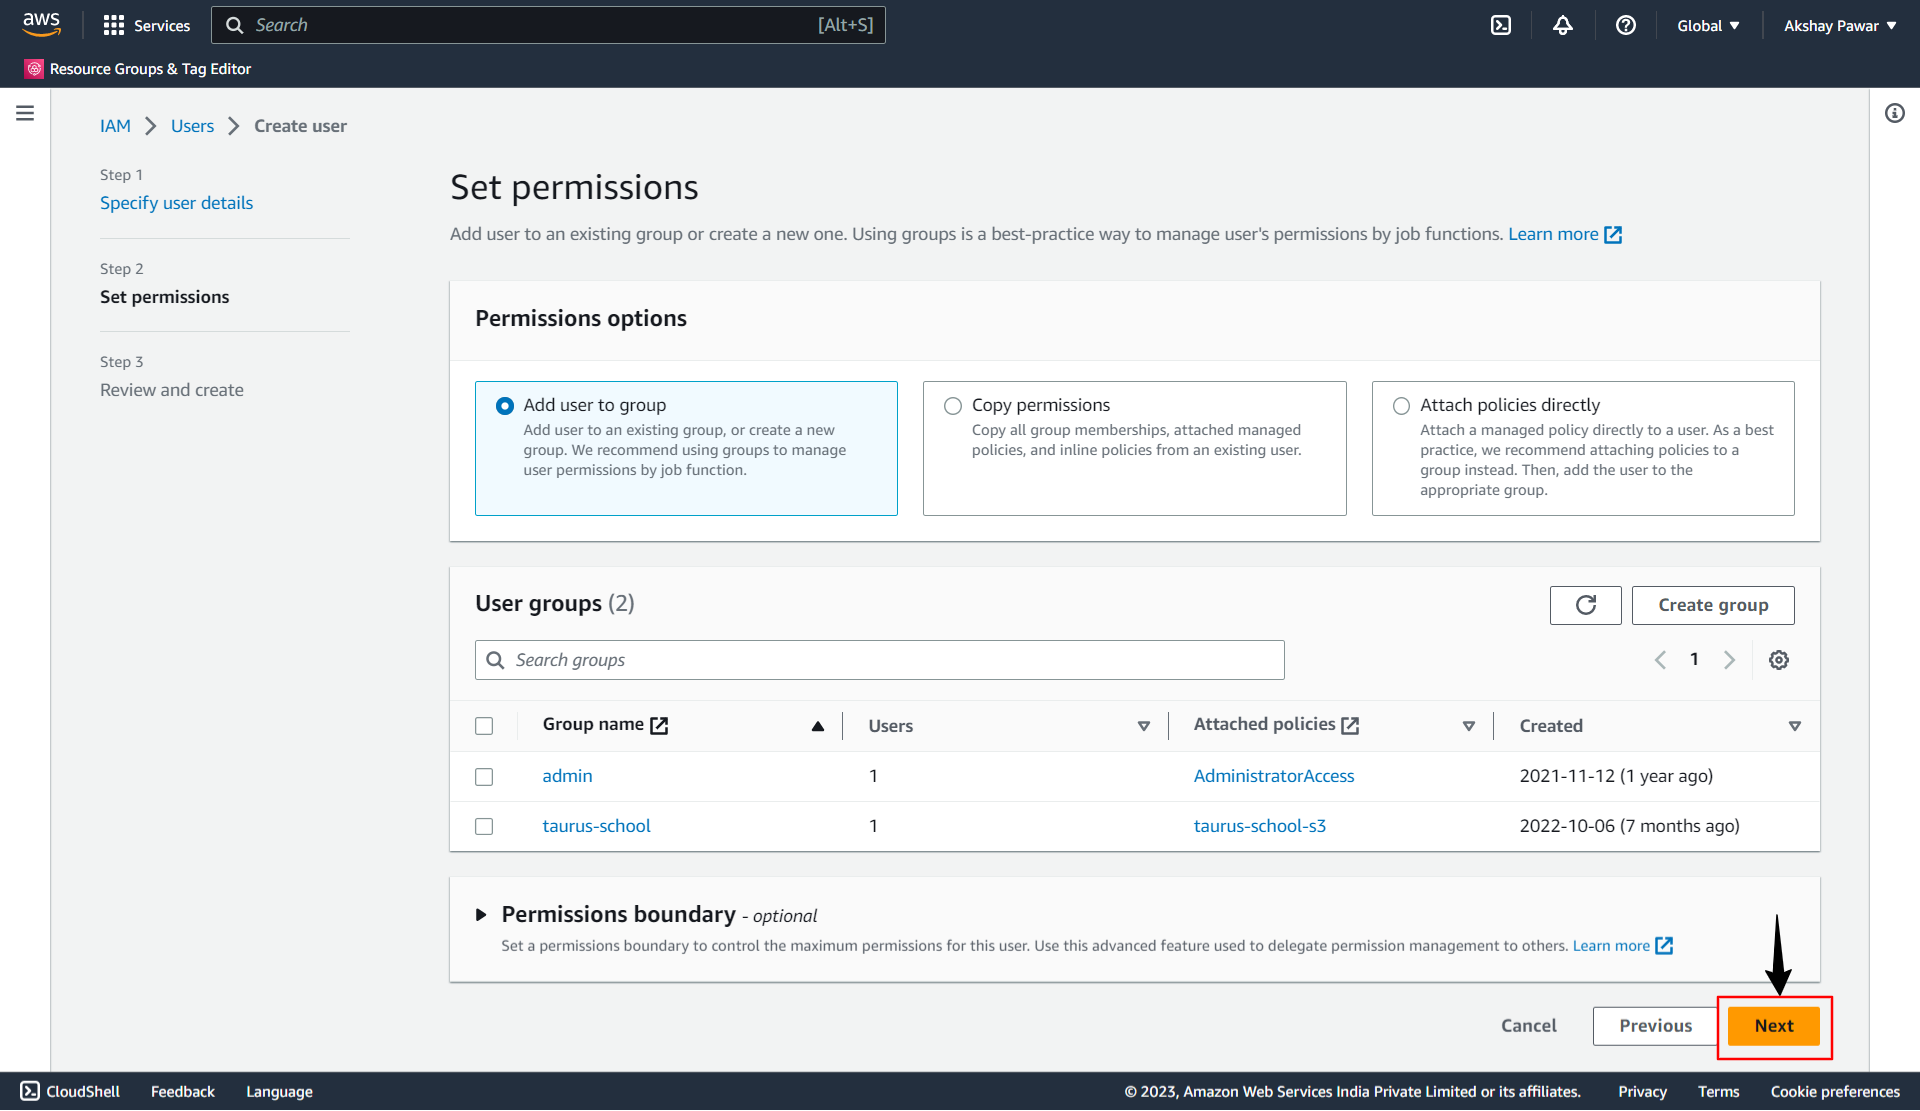
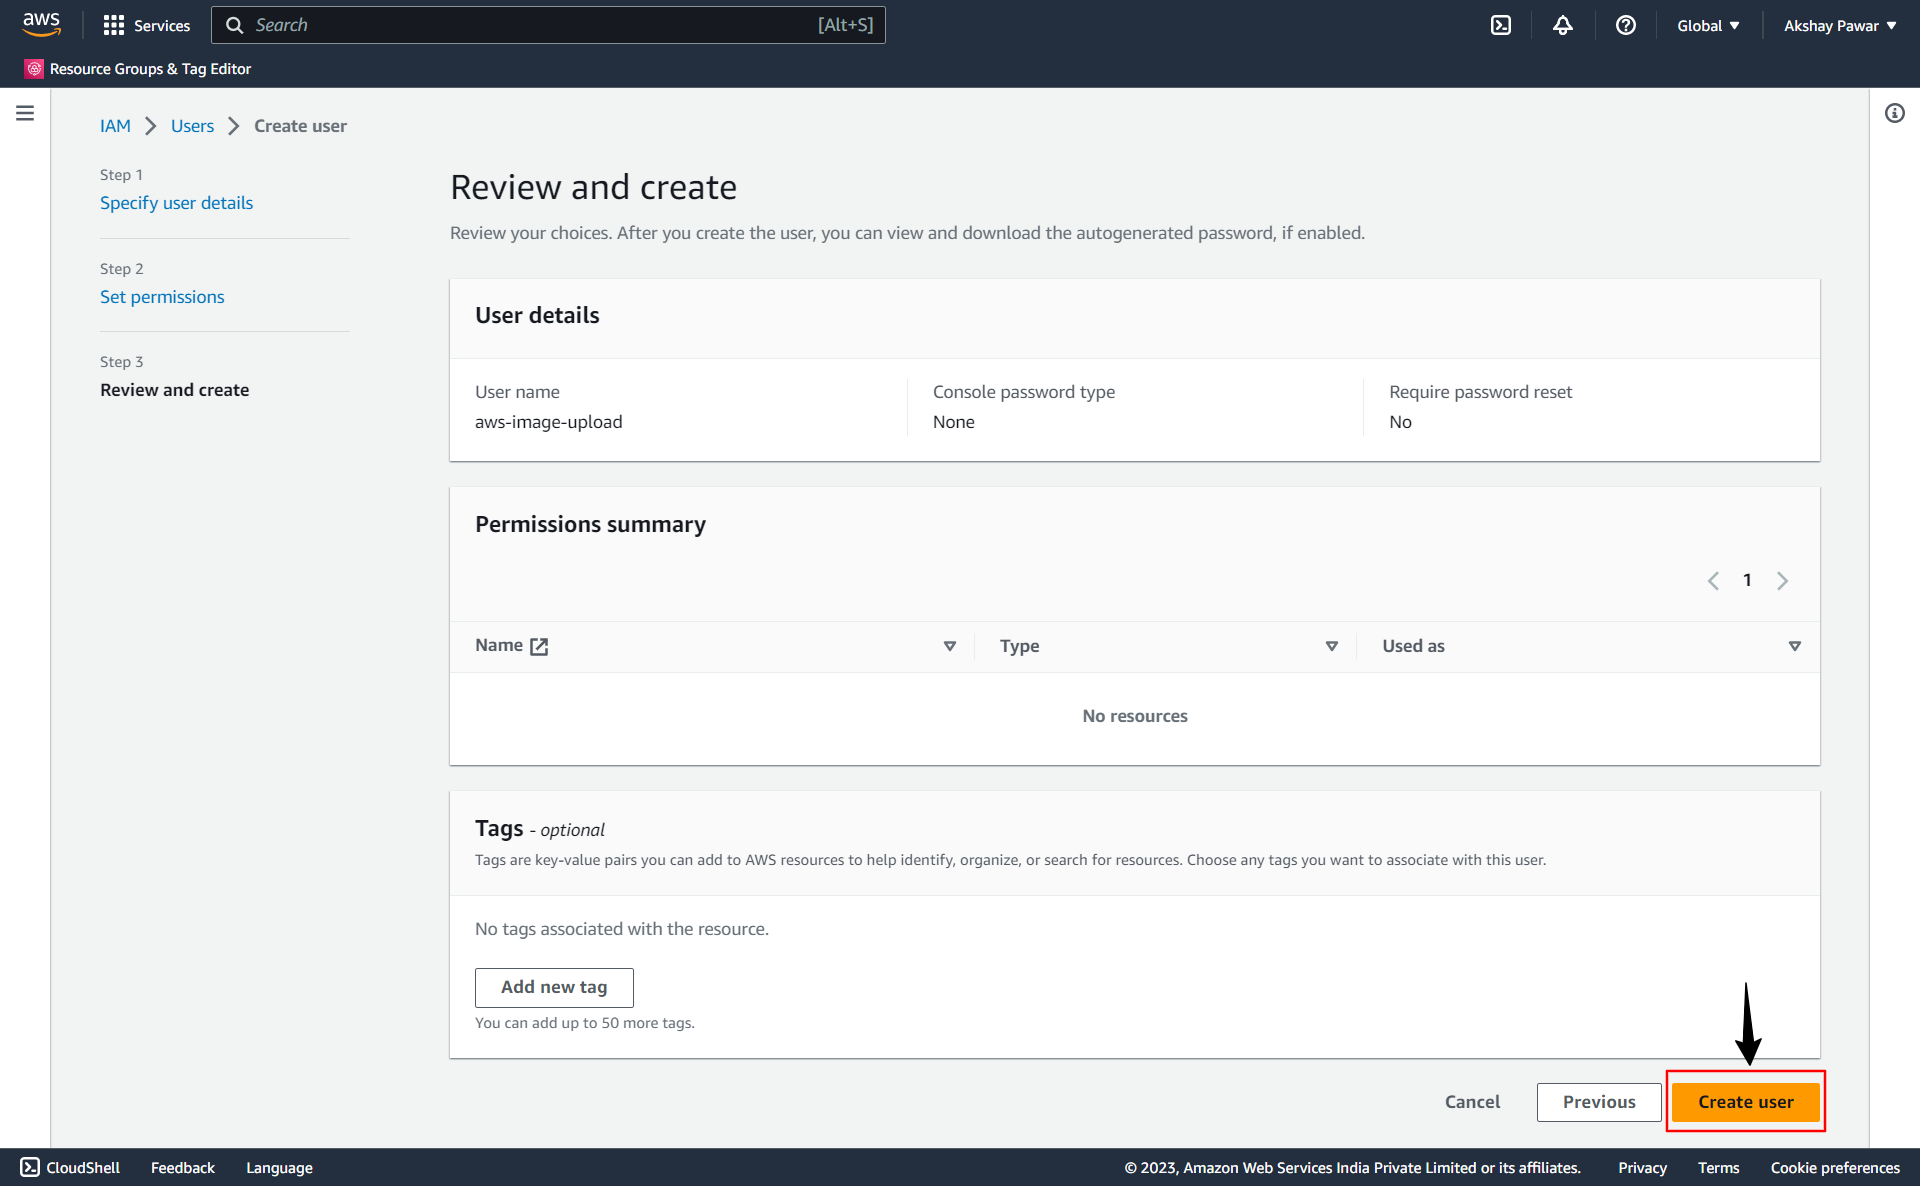
On the Review and Create page you can add tags to the user. It is optional. Click on the Create user button.
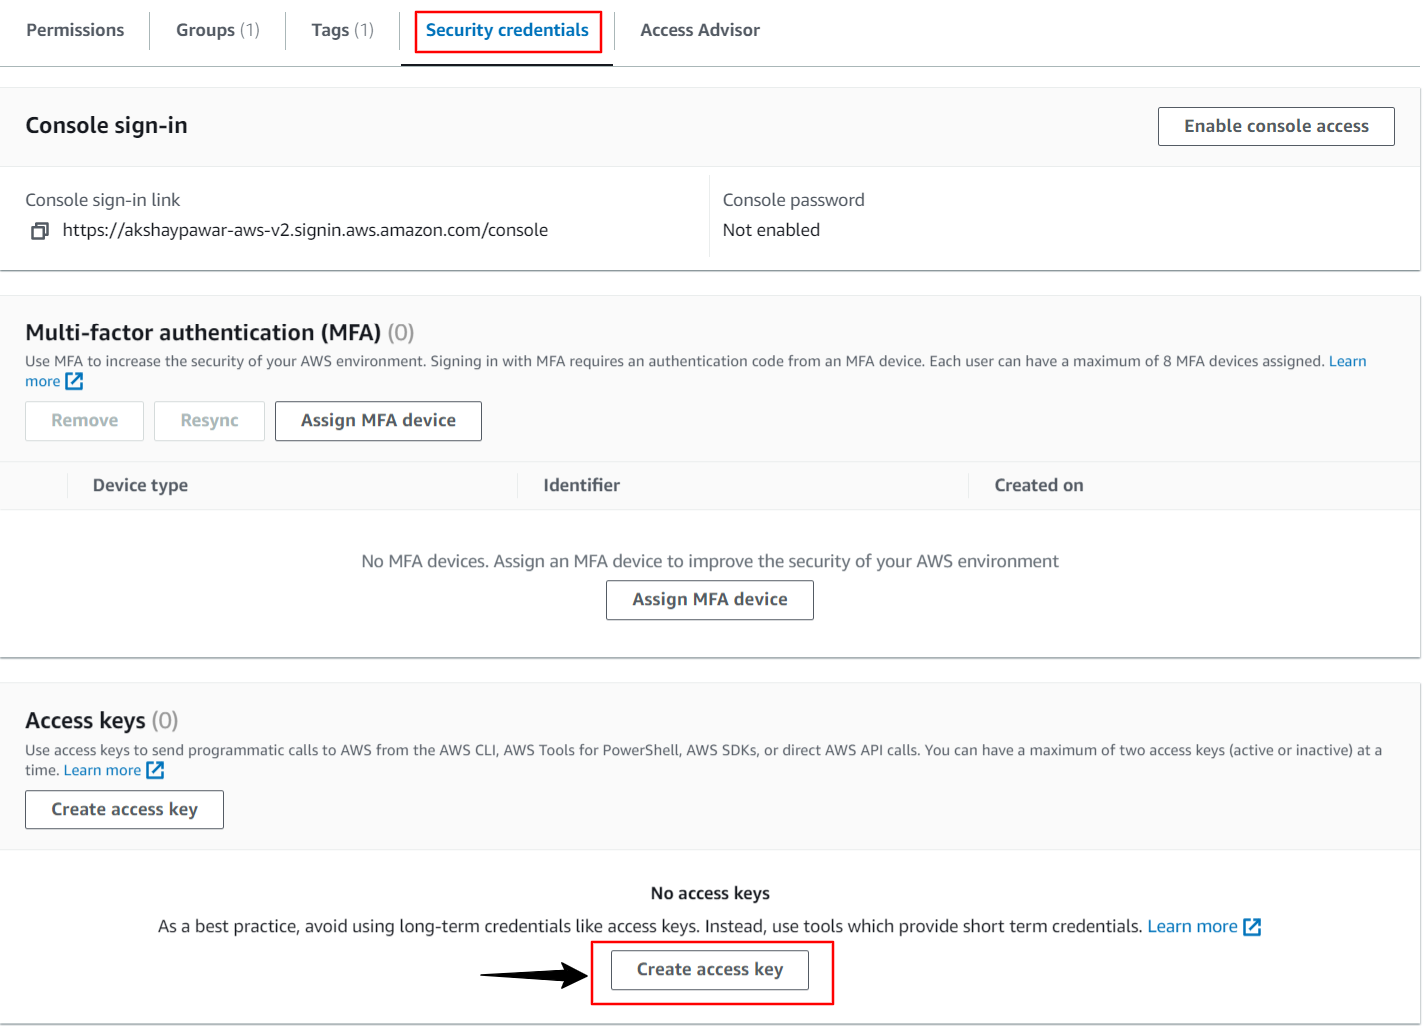
4. You can find your newly created user under the Users list tab. We are required to create user access keys for programmatic access to AWS through our Django application. Click on the newly created user name. Under the Security Credentials tabs, you will find the Access Keys section. Click on the Create Access key button to generate access keys.
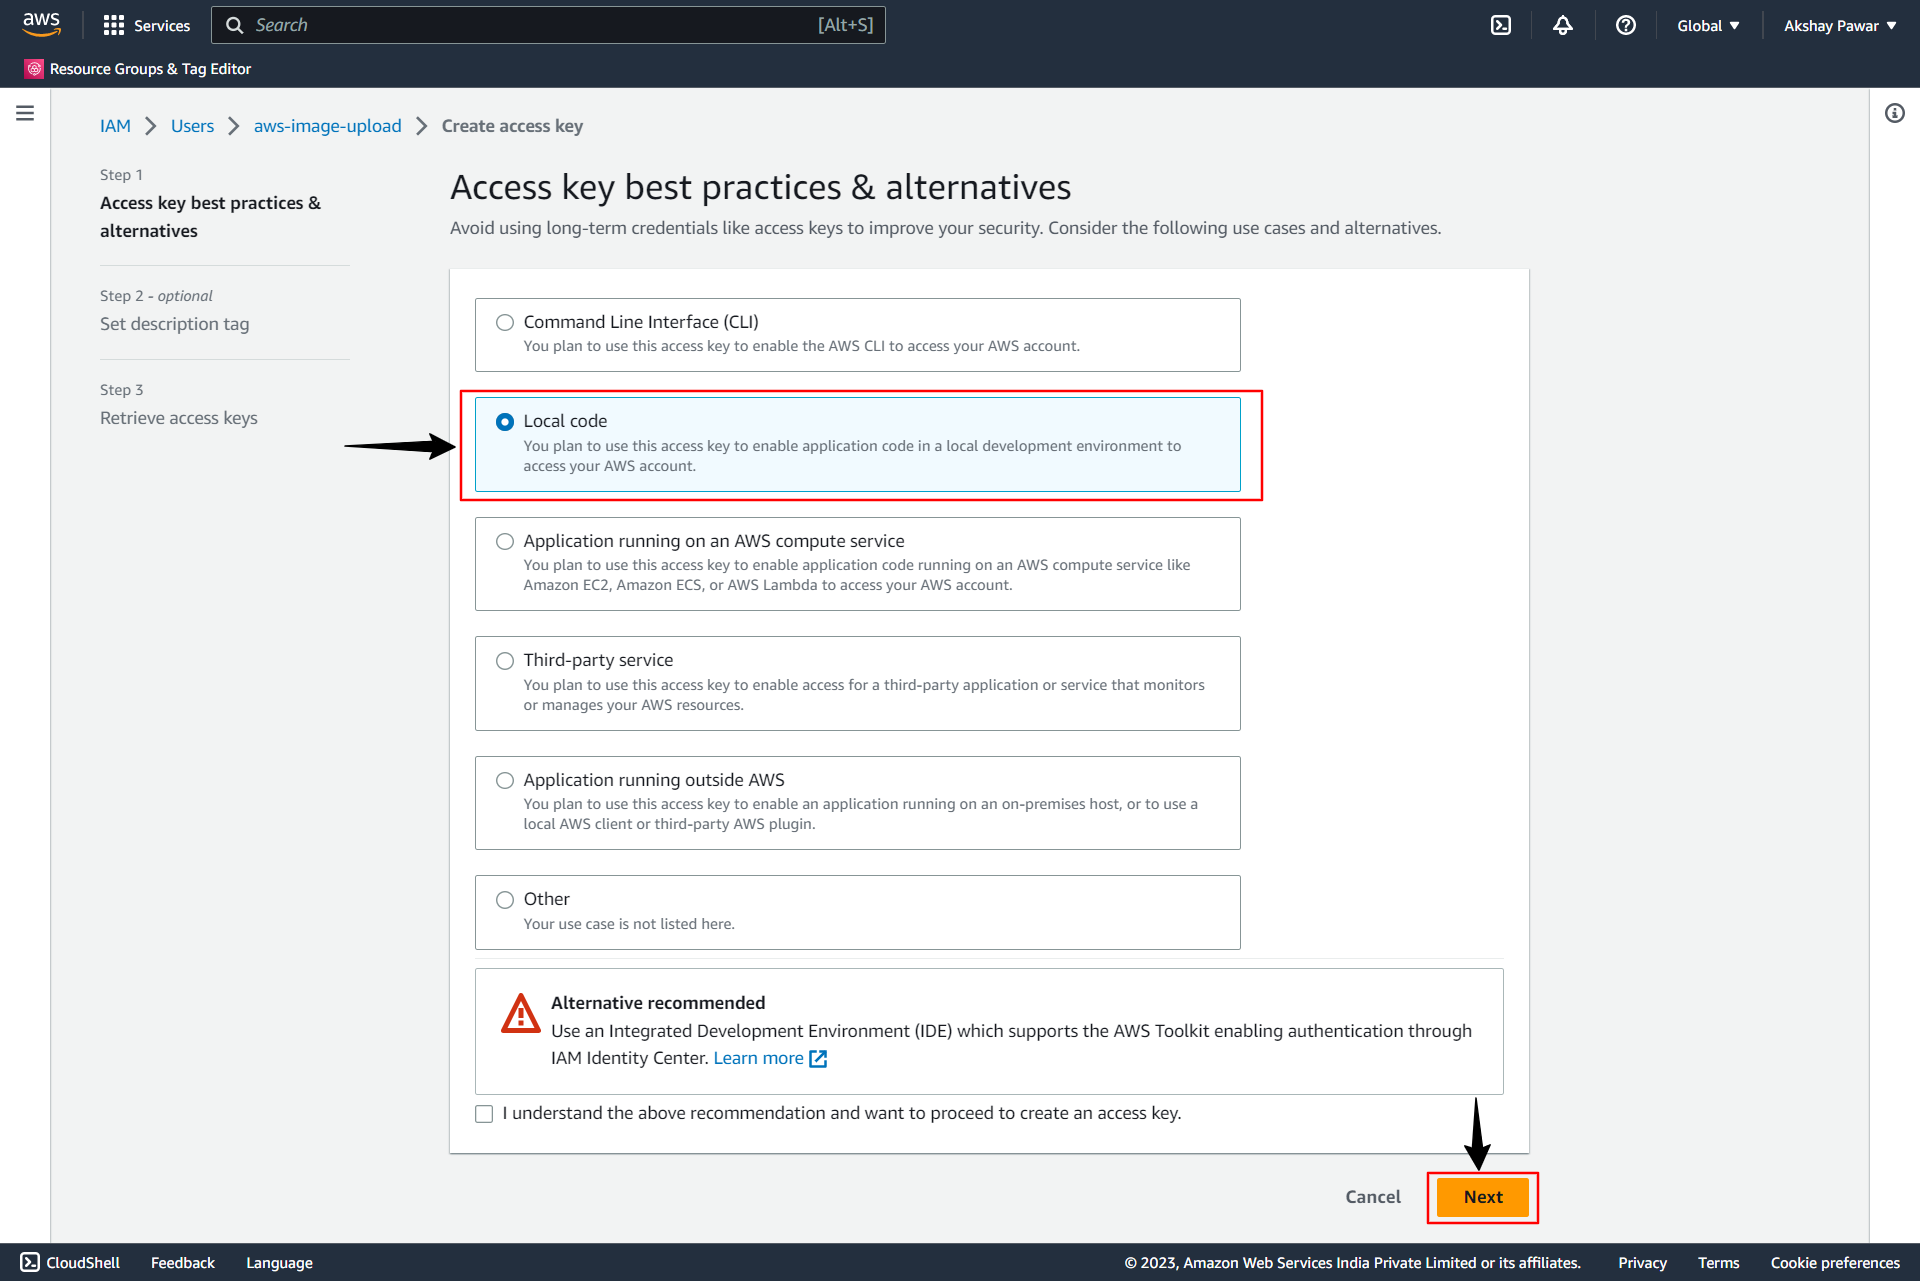
Inside the Access key configuration, you can choose the following use cases and alternatives as per your preferences. For this blog, we will select the Local Code option. Click on the Next button.
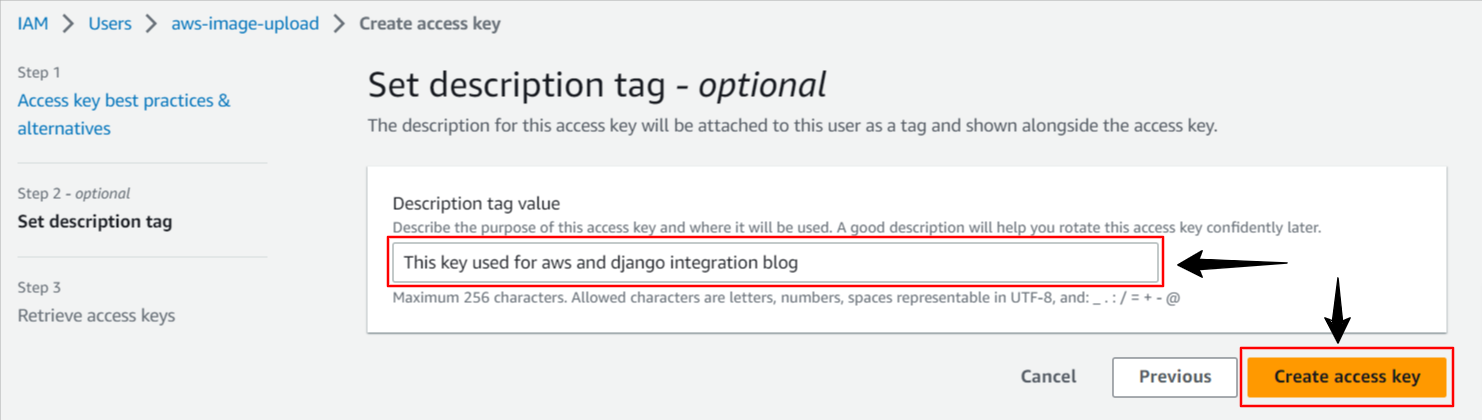
Set a description tag and Click on the Create access key. The description tag is optional but this will help you to rotate the access key confidently later.
Note:- Now this is important when the Access key is created, you can view it only once so make sure you copy it and save it somewhere safe. Also, you can download it in CSV format.
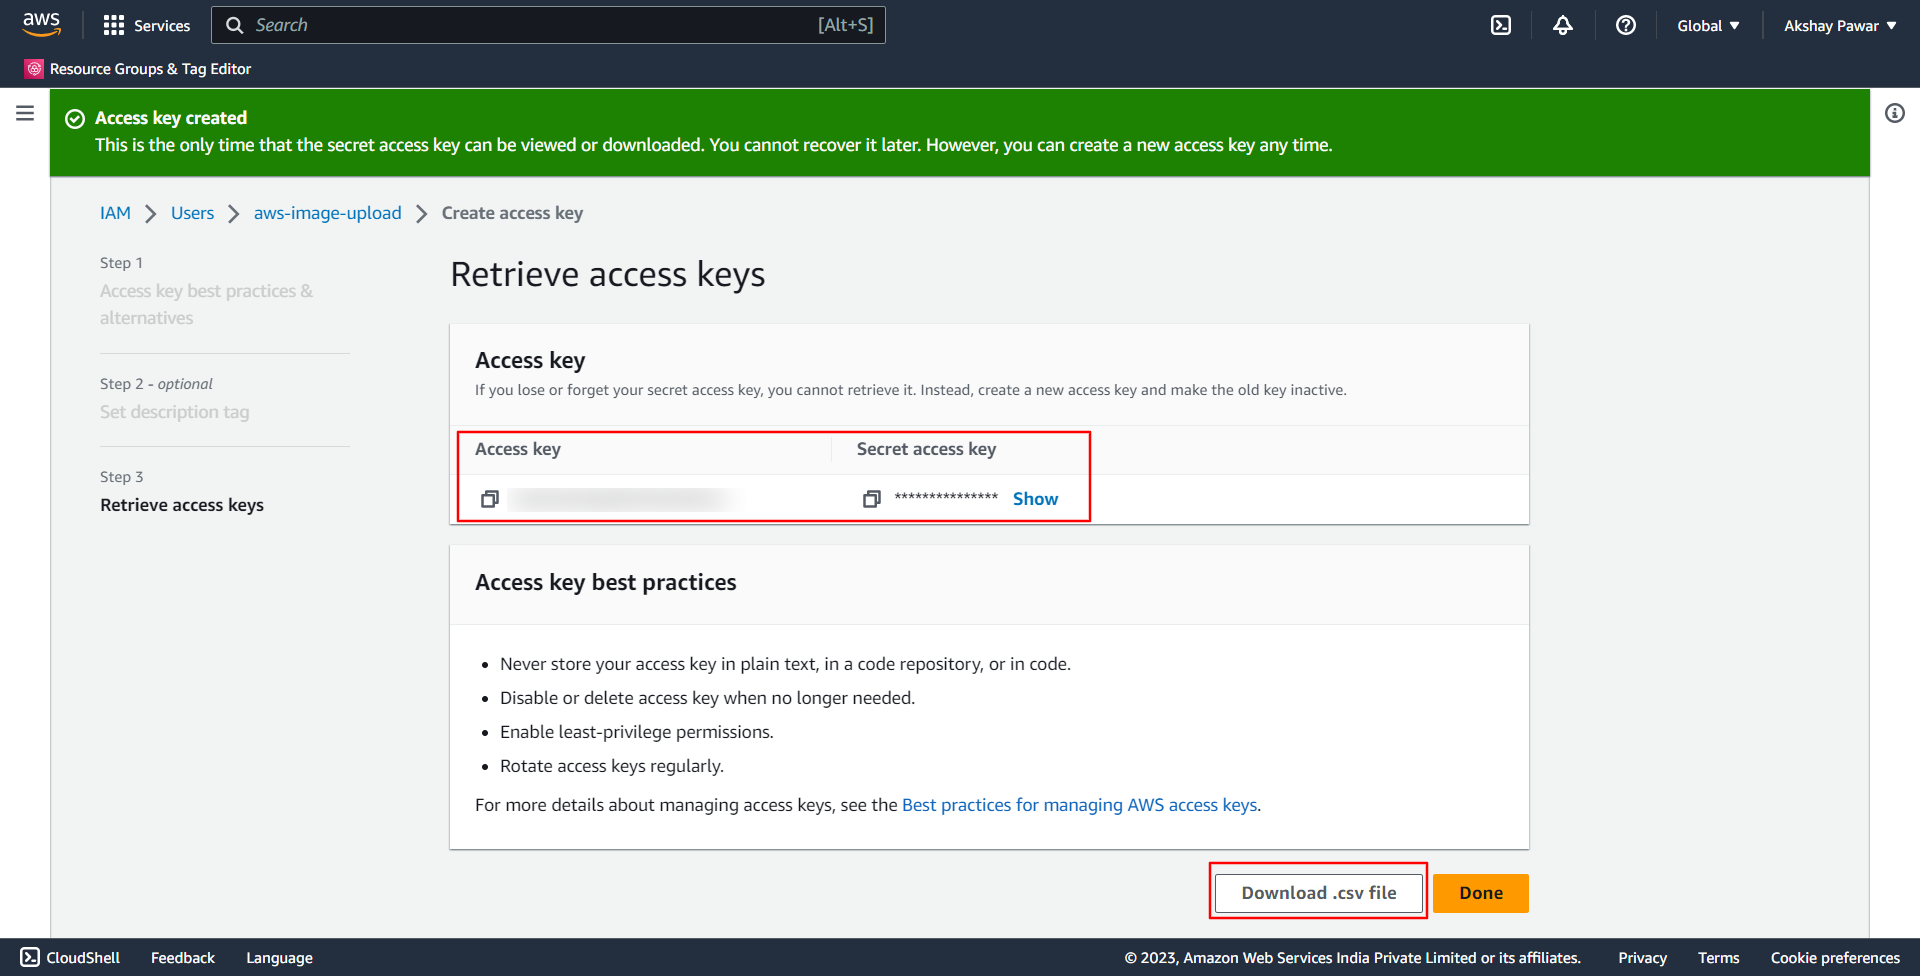
After downloading click on the Done button.
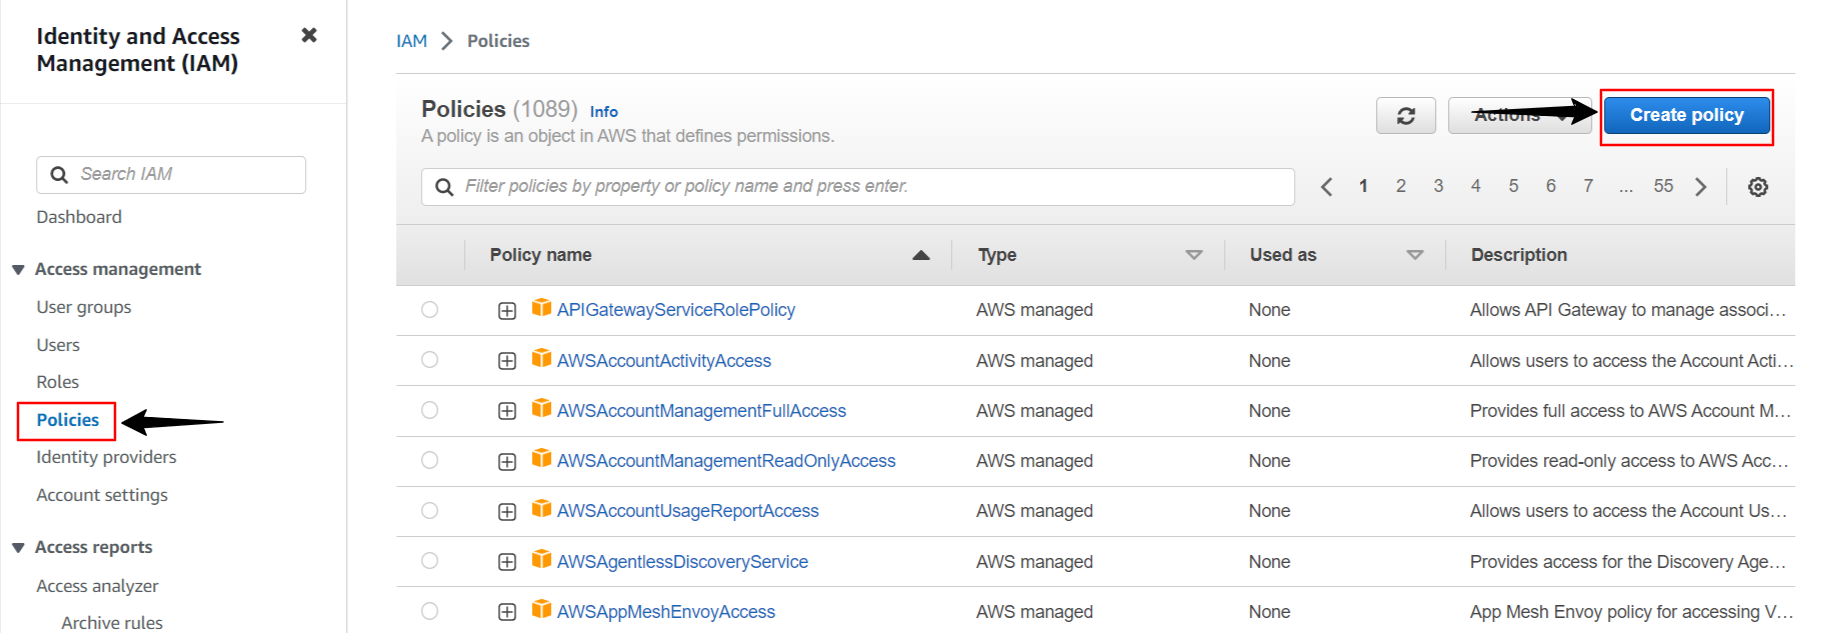
5. Now we will create a policy. Click on policies and then click on the Create Policy button.
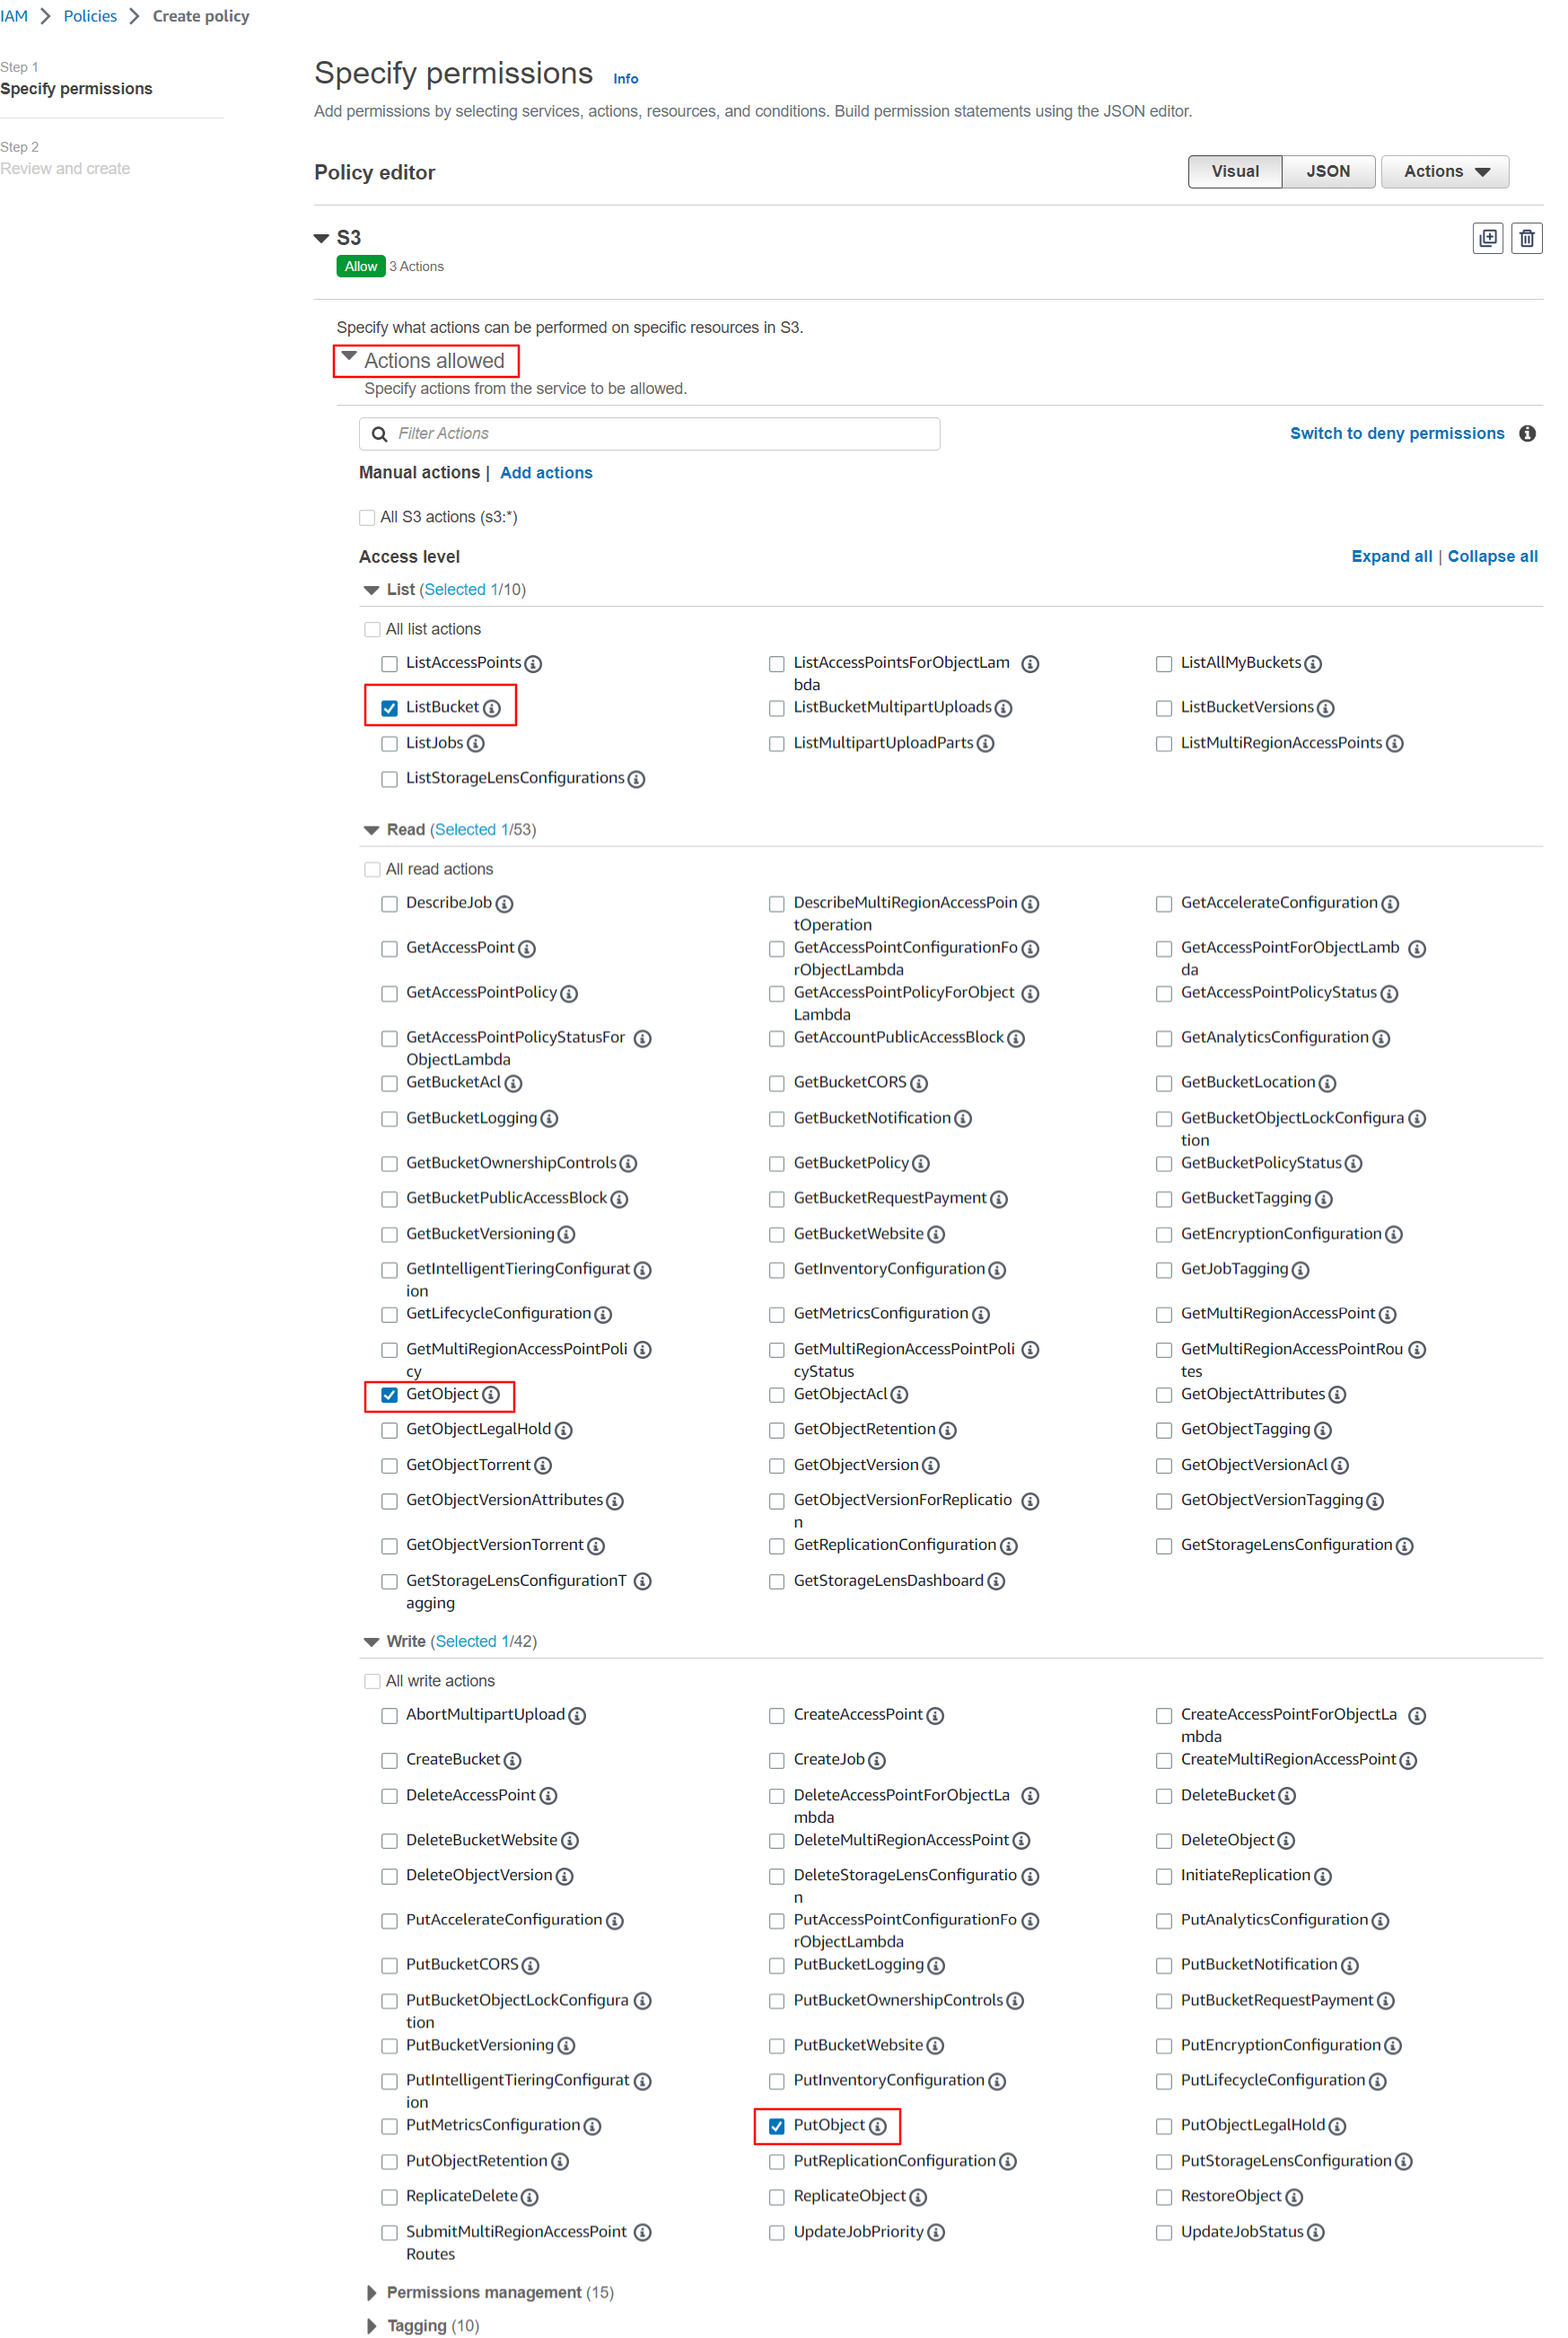
In Specify permission, first, select a service to which we want to attach a policy. Search or Select actions that can be performed on specific resources in S3.
for our use case, we will select ListBucket, GetObject, and PutObject.
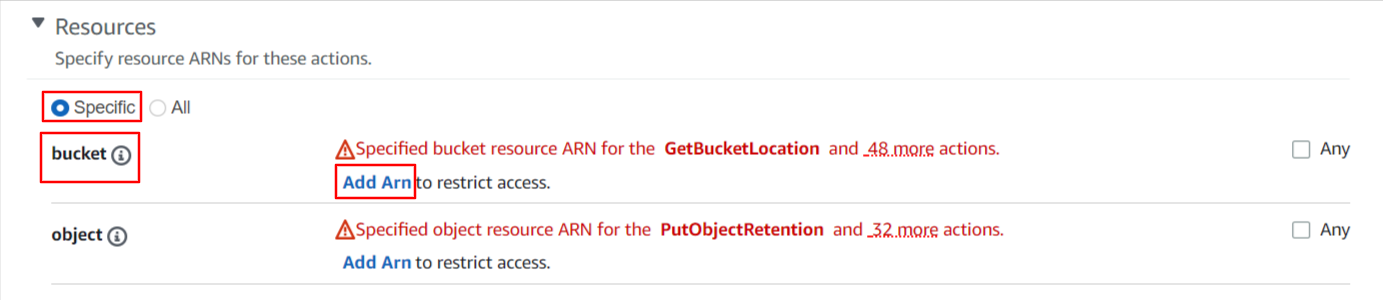
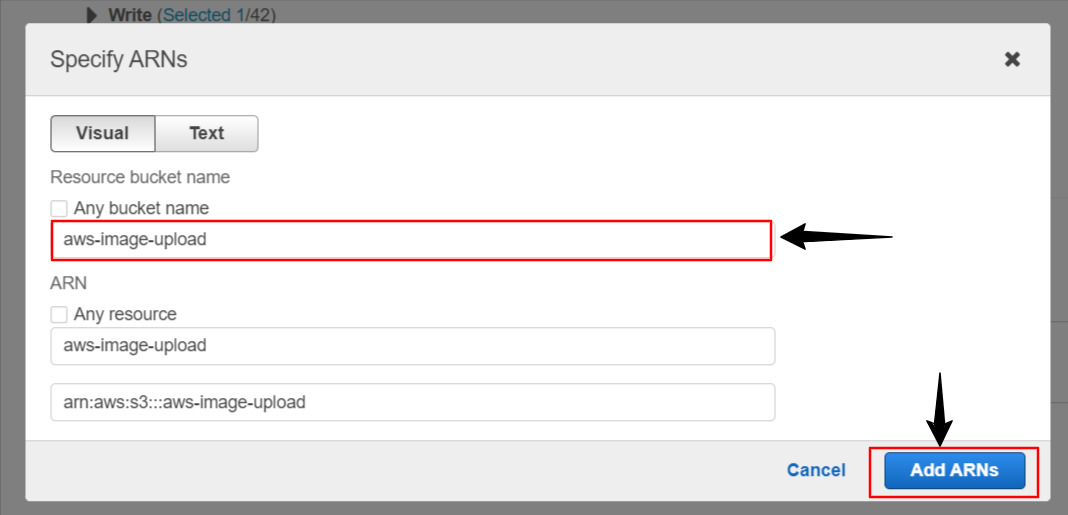
In the Resources section, select the Specific option, and for the bucket option click on Add Arn.
In the Specify ARNs prompt, specify your bucket name and click on the Add ARNs button.
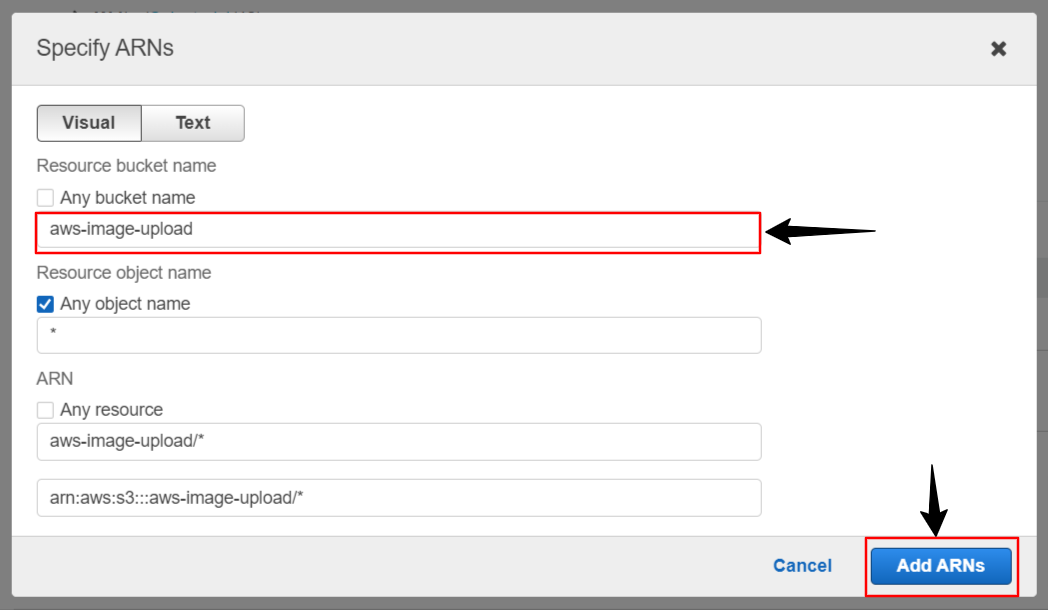
In the Resources section, select the Specific option, and for the object option click on Add Arn.

In the Specify ARNs prompt, specify your bucket name, and for any object name option put an asterisk (*). Now click on the Add ARNs button.
Click on the Next button.
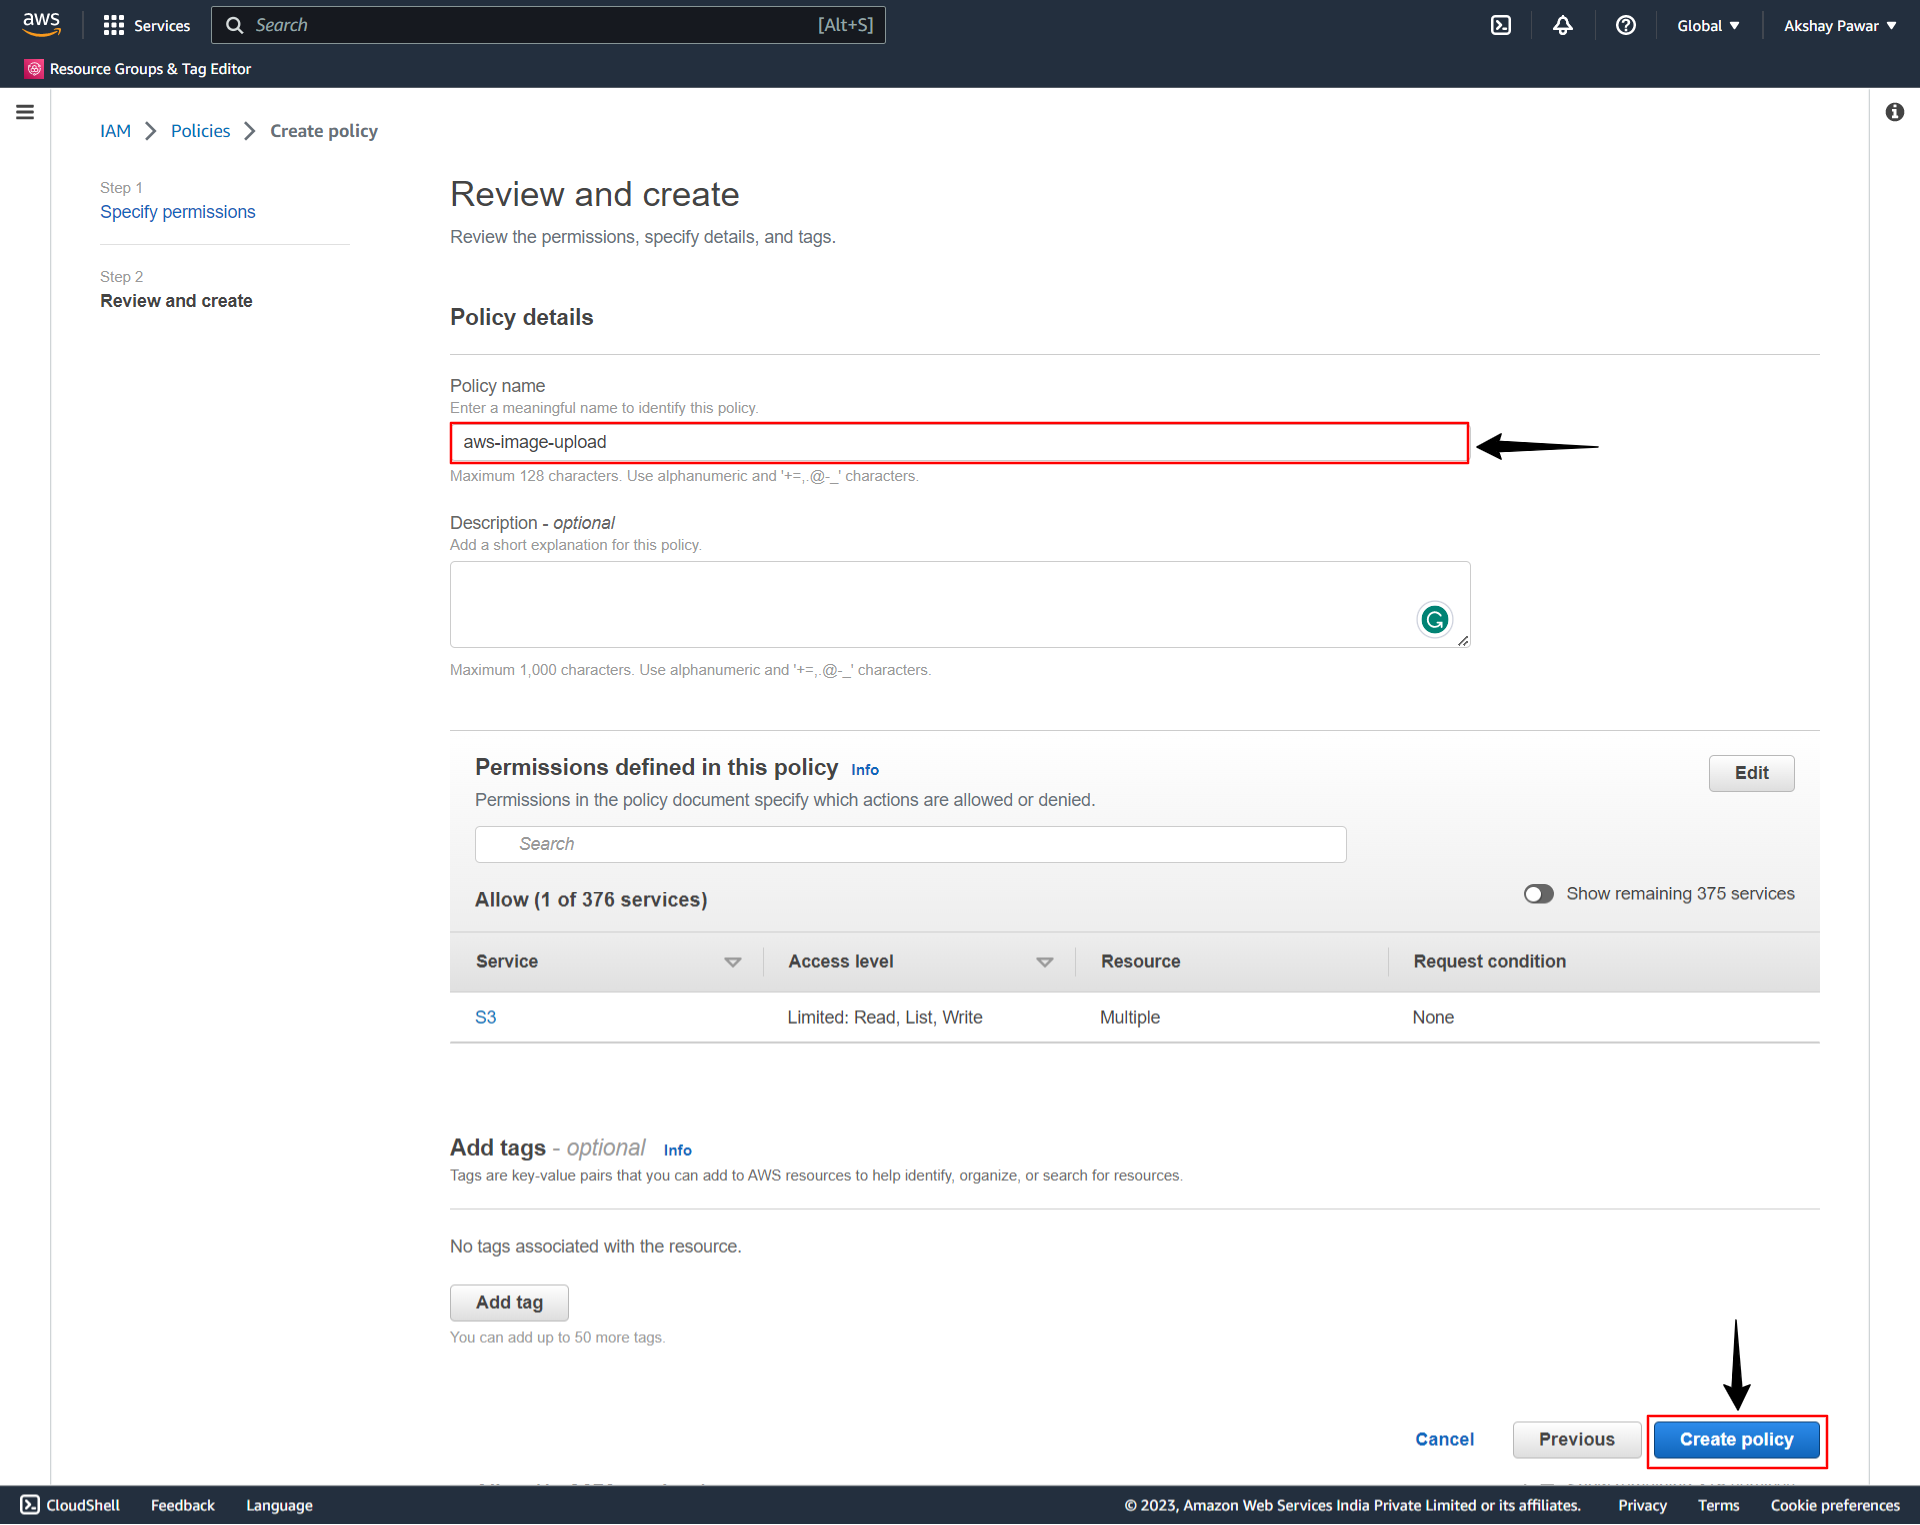
In the Review and Create tab, specify the policy name and click on the Create policy button.
6. Now we will create a user group and add users to the group and attach permissions policies to the user group. We can also create users and policies along with creating a user group process or you can create users and policies separately and later add to the user group.
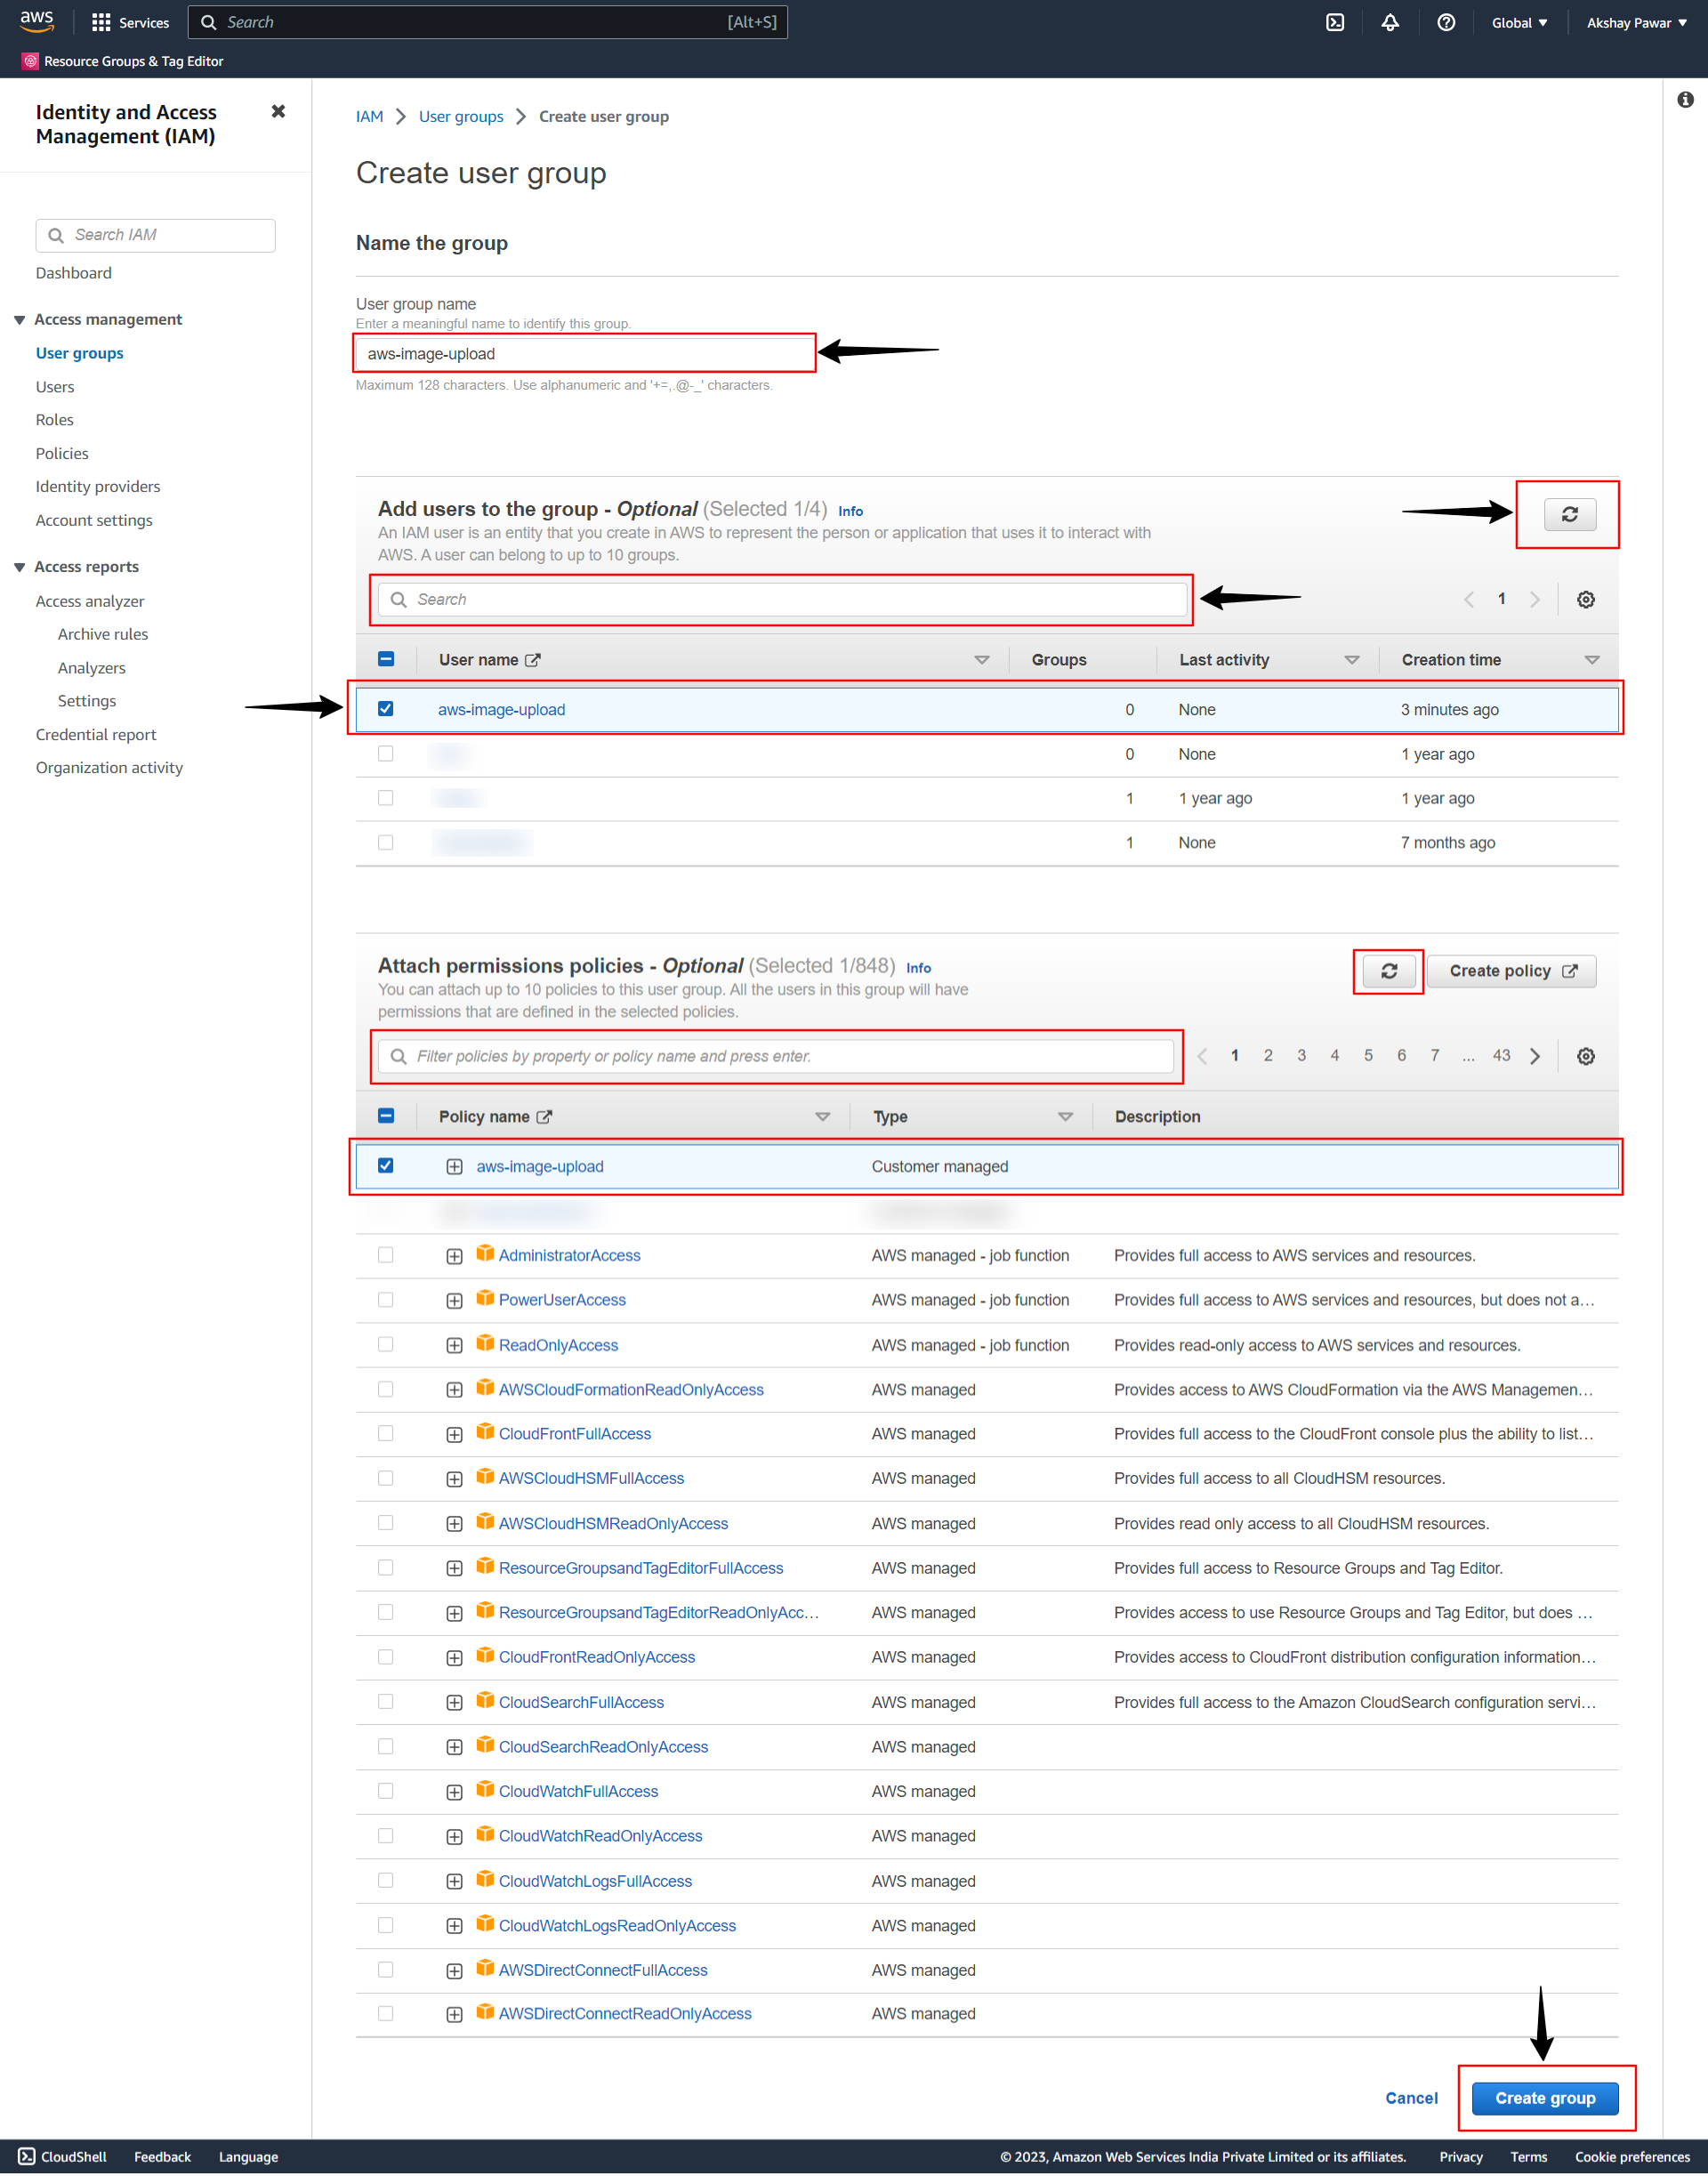
We already created a user and policy for our bucket, so select or search our user and policy and click on Create group button.
7. In this part we have configured the AWS service. In the upcoming series, we will configure our Django app with AWS settings and different packages.
Oxvsys Automation has expertise in AWS S3 and a deep understanding of various cloud technologies. We have extensive hands-on experience working with AWS S3, the cloud storage service offered by Amazon Web Services.
Oxvsys has not only utilized AWS S3 for storing and managing assets but has also written a series of insightful blog posts on various cloud technologies. Our blogs cover a wide range of topics related to cloud computing, including AWS S3 best practices, data management strategies, cost optimization techniques, and integration with other AWS services.
Contact us today or schedule a call via Calendly
Stay tuned for the next part of the Django AWS S3 blog series